Showing posts with label Crafting. Show all posts

Sunday, 17 February 2019

Hello 2019 !

Hello there and Happy New Year to you! 
Yes I know, how bad am I as we are now in February! 
It's such a shame but I'm wondering if people still read blogs as much as they use to. Sometimes I'm adding something to the blog and I wonder how many people will read it and leave me a comment. I love to share my crafting goings on but without any interaction from readers I really do wonder if its worth it..............
Anyway I thought, give it another go and see what 2019 brings.

So I will start off this years blogging by sharing some Artist Trading Coins (ATCoins) I have created to help inspire members of the 'I Love IndigoBlu' Facebook group as we are going to start a new swap starting on the 20th February. So if you are already a member then why not join in. If you are not a member but are interested please come and join us!

The first step for making one of the coins into a shaker ATCoin is to decorate a piece of white watercolour card stock. For this I mixed up some of the new colours of  Luscious Powder (Peacock, Bulfinch & Quail) with some tepid water in little spray bottles, then lightly sprayed the card. I sprayed two colours then dried the card then went back in with another of the colours. 

 I used my stamping platform and black Tonic  nuvo Hybrid ink so that I would get a better stamped impression of the New IB stamp Open your Heart over the sprayed card stock.
 I then used a 2 1/2" punch (You can also use a Die or draw around a glass if needs be) to punch out the front of the coin.
I then punched out 5 more 2 1/2" card circles with a 2" aperture punched out from the middle creating boarders to layer together to use instead of foam tape. ( if you have any funky foam you could use that to create the depth needed for a shaker card). 
The Collectors Edition Stamp no 23 Artist Trading Coin was stamped and punched out to use as the base of the shaker.
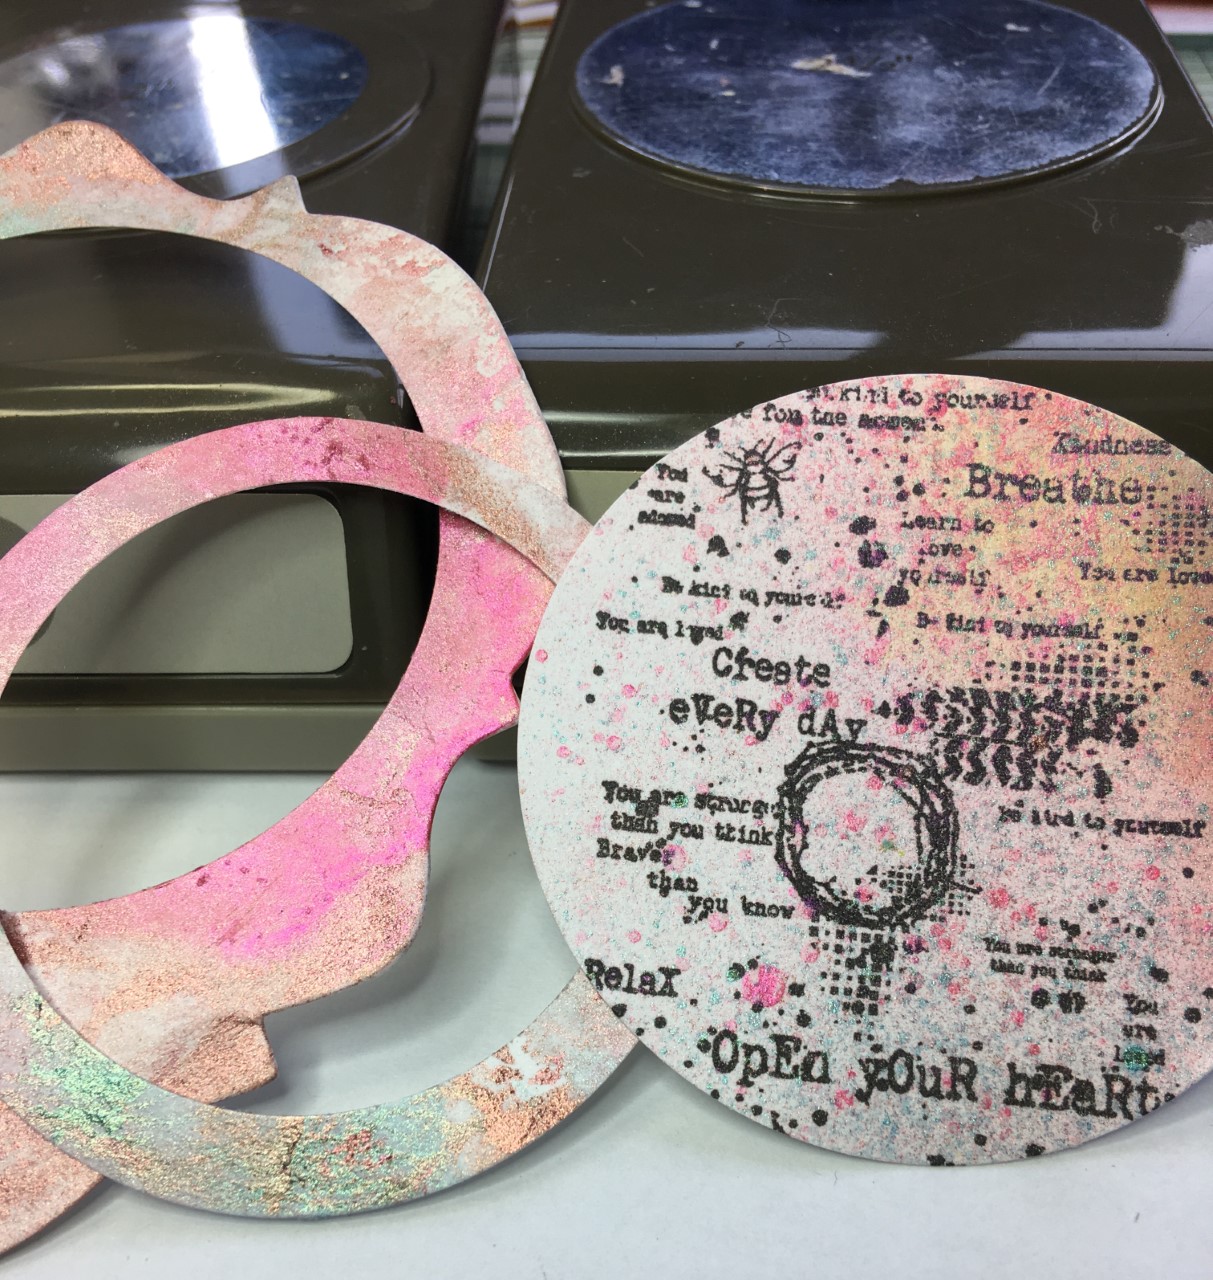
 From another piece sprayed card I punched out a boarder (done as above using the 2 different size punches).

 A circle of acetate was glued onto one of the white boarder pieces and then the coloured boarder was glued on top to create a lid. The remaining white boarder pieces were glued and layered up.
 The stack of boarders were glued to the shaker base making sure glue hadn't seeped though and two of the NEW colours of the Textured Art Stones were added inside to create the shaker. (Glitter or small beads would be good for this as well). The Acetate top was then glued into place.


 To create the other two coins I used Distress Oxide inks to create a background of colour first on watercolour card. The first coin was then stamped in green ink using the Calm and Relax stamp and the Peacock Luscious powder was mixed up with some the Super Thick Slap it on then put through part of the Moroccan Tile Stencil
The last coin was stamped using the  Fandangle Feathers, and using the Basket Weave Stencil Bullfinch Luscious powder was mixed up in the Super Thick Slap it on to create extra texture.
Extra details were added to the coins and I got to use one of the New Jane Davenport Gold Pens I purchased from the IndigoBlu shop. 
I have to say I'm loving using all of the above craft items.
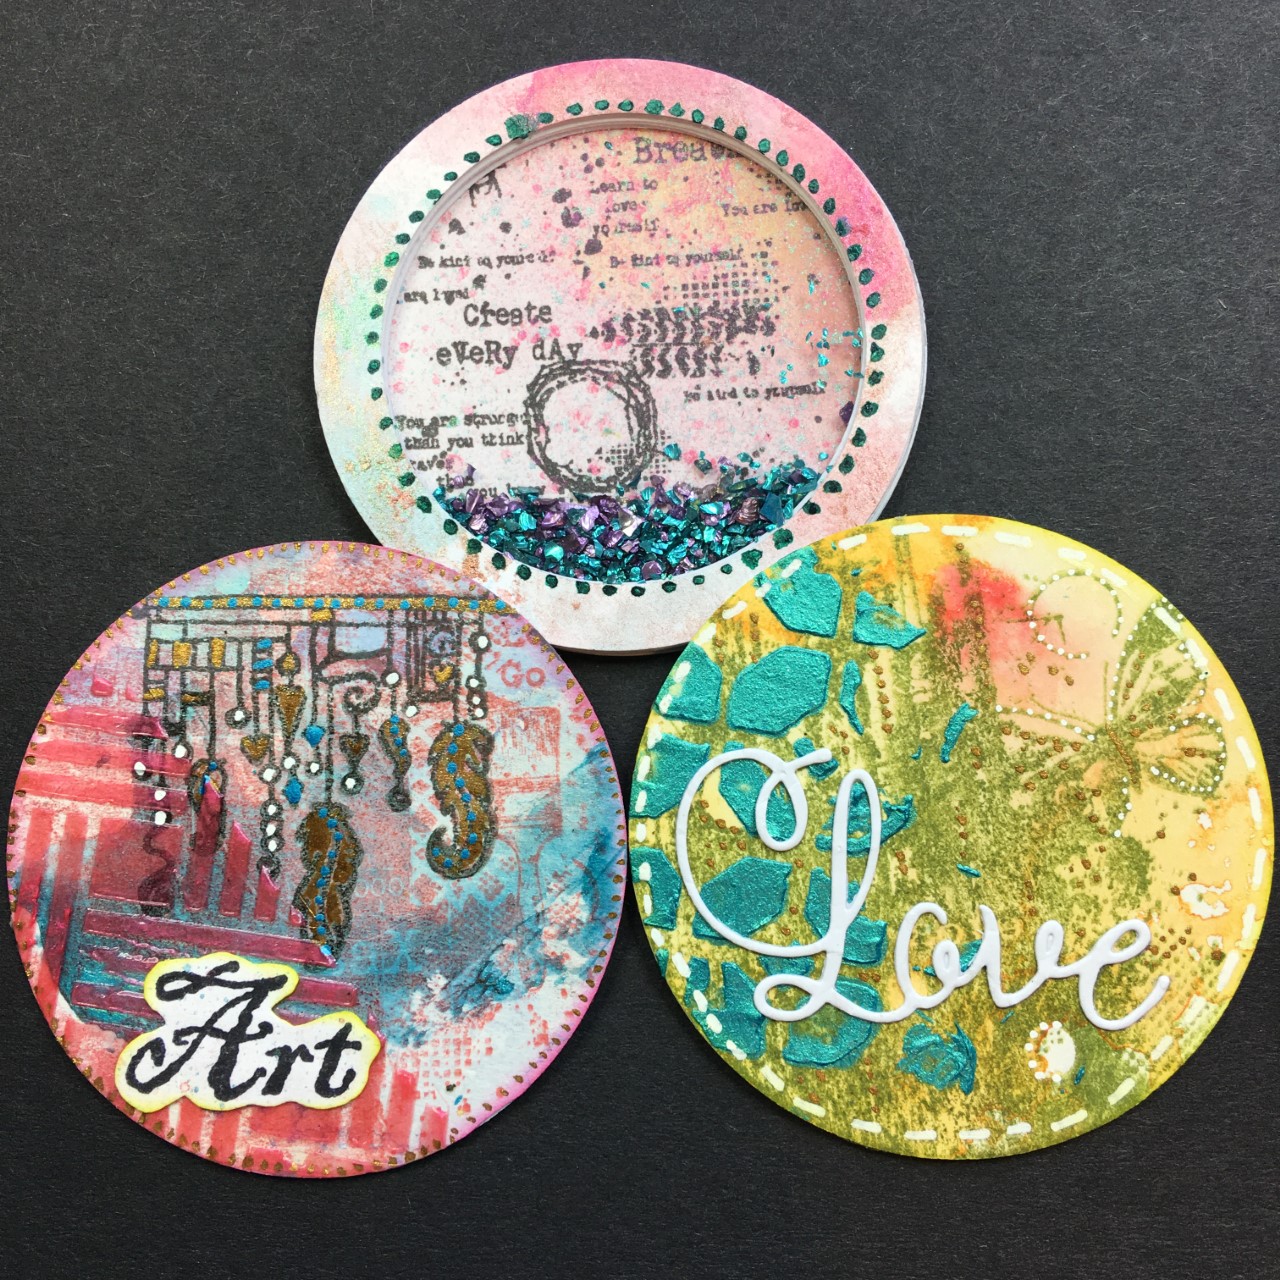
So there you have it. ATCoins and one of them being a Shaker Coin. Enjoy.
Thanks for checking this out.
Happy Crafting and Swapping,
Sue  xx


Saturday, 9 June 2018

Artist Trading Coins and a little Storage Coin Holder

Evening all,
I received a request on Face Book today to share how I had made my little round holder for the Artist Trading Coins I had swapped in my challenge group so here is a quick step by step on how the holder was made. Of course you can spend more time decorating yours. 
I used some of the spare circles I had left after making my swap in this tutorial, but unfortunately I didn't have a spare strip for the gusset so used white card which I will decorate at a later date. (I promised I would get this tutorial done today)!
Just before I move onto the holder I wanted to quickly explain about the ATC (coins). So you may have heard about Artist Trading Cards, well this is the same thing just round instead of square, hence the Coin part. Mine are made layering up, four 2 1/2" circles of punched out 300 gsm card.
These coins are decorated front and back but its up to you how you decorate them.

Here's how I made the holder.

Step 1. Punch out four 2- 1/2" circles and a strip of card measuring 1- 1/2 " x 4"


Step 2. Score the strip of card at 1/2" & 1"

Step 3. Snip out small triangles either side of the middle strip. This helps to curve the card into a circle shape ready to stick onto one of the punched out circles

Step 4.  Next roll the strip of card around a pen to loosen up the card fibres

Step 5. Fold the card strip along the score sides and curve into a semi circle

Step 6. Now you need to start putting things together. I found it easier to start from the middle of the strip, one side at the time using wet glue. You will need to help curve the strip  around the circle.
Hope this makes sense, check out the photo

Step 7. Once you have attached one side of the card strip, glue another circle over it to tidy it up and strengthen the sides. Using the same steps above, attach the 2nd side of the box.


Step 8. I found using a bone folder helped to push down the little triangles inside the holder

Step 9. All that's left to do now is to decorate the holder and colour in along the edges.

Here are some extra photos of the coins and holder I have posted on Face Book.
I hope this helps you make some of your own, they really are fun to make.

Front of the Coins

Back of the Coins
If you have found this post helpful I would love for you to leave me a comment and follow my blog. 
Enjoy
Happy Crafting 
Sue xx


Sunday, 18 September 2016

Alexandra Palace, fondly know as Ally Pally!

On Friday Martin and I traveled up to London so that I could go to the Craft Show at Ally Pally as IndigoBlu had a stand there.
It was touch and go as to us going as I was so nervous about meeting Kay Halliwell-sutton and Jenny Marples for the first time but I am so glad I did go.
Both Jenny and Kay were so welcoming even though they were both rushed off their feet with Demo's, workshops and answering all sorts of questions and queries. Alfie H-S was doing a sterling job manning the till. Suffice to say I managed to buy a few extra bits that "I really needed"!

 Kay and Jenny
 Front of the IndigoBlu stand where Kay was demonstrating and I spied a few of my projects 
Alfie and Kay H-S. Husband and Wife team. Such lovely friendly people

I have to say, not sure what I expected to see, but I wasn't expecting this. 
The building is very grand, quite a few steps leading up to the Palm Court entrance and the landscape around is lovely. The car park was hidden behind tree's so it really didn't feel that it was going to be that busy. (I have only ever been to the National Indoor Arena (NIA) in Birmingham for Craft Shows before so I suppose I was thinking on those lines about this show.) No comparison at all!


The day was a busy one and at times a bit hectic. (It doesn't show that here as I took the photo's when I left the building)!
As I didn't have a ticket I joined the queue to purchase one then was able to make my way into the hall. Now to find the IndigoBlu Stand! I decided to walk down the center and towards the Hochanda stand and soon found the IndigoBlu Stand.
Everyone was so busy, I could see that Jenny's workshop was coming to an end so went over to see her first. I said 'Hello' and it was lovely that she recognized me. I then spoke brifly to Alfie and with hands trembling went and said hello to Kay. Why was I so worried. Both Jenny and Kay welcomed me and are really lovely ladies. 
As they were so busy I said I would pop back later to see them. I went off to see what else was at the show then messaged Jannet Blay whom I knew was there with her Mum and we arranged to meet up. It was lovely to meet someone else who shares the same love for the IndigoBlu products. Jannet is also a newbie, she is on the International team and creates the most wonderful pieces. Check out this project, very special.
So after looking around the show for several hours, buying a few pieces, checking out a few more stands, taking photos of some wonderful pieces I went back to the IndigoBlu stand and managed to have another quick chat with everyone and asked if I could take a few photos.


By 3pm I had arranged to meet Martin outside so I said my Goodbyes and went outside to start our journey back home.
Happy Crafting xx


Saturday, 2 January 2016

Happy New Year Everyone

Hello there, and a Happy New Year to you!


Well, that's Christmas done and dusted, the New Year has just started and I think this is the time people tend to reflect on the past and think of whats to come. 

Crafting is a big part of me and my life! I find it relaxing if sometimes a bit daunting but I always enjoy the time I spend creating.

Over the last few days I have been looking back over some of my YouTube video's.                     Manly because I can now view them on the big screen (the living room TV) and watching them I have groaned because they are either to long and I got bored, (what must have you thought)? or I have quite surprised myself, that some were better than I thought. 

I posted a video just before Christmas showing some of the interactive cards I made and had a lot of fun and learnt quite a few new editing bits and bobs with my son Matt helping me out. Following on from that I have been asked to do a few tutorials, so please watch this space. 

(Just in case you missed the video here it is again).

Have a great 2016. I look forward to catching up with you again soon.
Happy Crafting,
Sue xx

Sunday, 20 September 2015

A little pot of 'Wow' - Brusho Crystal Paints

Hello to you and thanks for stopping by.
A few weeks ago I purchased some little pots of Brusho's and I have been having so much fun with them.


So just to remind you, this is what they look like. 


For anyone who hasn't heard of these yet they are a unique, transparent, highly pigmented water-colour ink crystal powder. They react with water so they can be used in so many different ways. They are permanent so a word of warning, don't get any on your clothes and be prepared for inky fingers!

I wanted to know at a glance what each colour looked like so I punched out a small scallop circle, used double sided tape to attach one scallop to each little tub, then took a pokey tool to make 2/3 holes in each tub. (Please don't be tempted to take the tops off the tubs as the powder is so fine, one sneeze and it will go everywhere)!
One or two taps on the upturned tub will result in some of the powder coming out. I mixed this with a little water to get the colour to paint the scallop top.

Using Brusho's is so easy to make quick backgrounds for cards. Just sprinkle powder onto card (I used different types to see what the effects would be on watercolor paper, Glossy card and Stampin Up Whisper White Thick card stock), spray with water and watch the magic happen!

                                     
Once the backgrounds are dry you can stamp on them, I used StaZon Ink, and add decorations. For the card above I used Die cuts, and the card below I stamped the poppies then painted them in with the red Brusho paint slightly watered down. Once this was dry I went over the poppy heads with crystal effects and added little yellow beads into the centers of some of the heads.


This was a mini Canvas frame I sprinkled Brusho's onto and sprayed with water. Once dry a flower was added along with some gems.


Another way is to add the Brusho's to embossing paste to create a new colour for your project using masks!


                As I said, you can do so much with these little pots, you just need to let your                                                                                         imagination flow!


                                                                          Happy Crafting xx