Showing posts with label Texture Paste. Show all posts

Tuesday, 8 September 2015

IndigoBlu Blog Challenge - Frame it!


Hello and Thank you for joining me today. Crafting has gone on a bit of a go slow for me in the last month or so, so im hoping to give it a kick start with entering this months IndigoBlu Blog Challenge. If you fancy having a go and would like the chance to win one of the wonderful IndigoBlu stamps check out this link!

So this month the Challenge was "Frame it"
Well anyone who knows me, knows I like "Different", so when walking around a local shop I found some Embroidery Hoops, and they are a frame aren't they, so I scooped one up and that was going to be the style for this challenge. I rather think that it has ended up looking like a giant Christmas Bauble!


So to get this look this is what I did!


I stretched some material I had in my stash (by Stampin up) over the inner hoop, then put the outer hoop over the material and locked it in place with the outer hoop. I then turned the hoop over and cut away the extra bits of material.


I then painted over the material with white Gee-Soo Good paint to help make a good base for adding other paint and inks, then once dry went over this with some English Cottage paints in Grandma's Teacup and Snow White.


Once again I left the paint to dry then went on to stamp on my design using a few different IndigoBlu stamps including one of their New Stamp sets called Snow Globe
The other set used was Here comes Santa. I used StaZon Inks for this part! Because of the size and shape of the hoop I was having a few problems finding something to place under the material so I asked my husband to cut me a piece of wood to size and it has worked wonderfully. 
(Thanks Martin xx)


The next step was to add some colour and texture to this piece and I did this by using Mega Flakes and Embossing paste with glitter in it through a mask from!


 I then decided the hanging baubles looked to flat so I stamped them again, cut then out and applied Crackle Glaze to them, hoping to give them a more vintage look. Once dry I glued them into place.
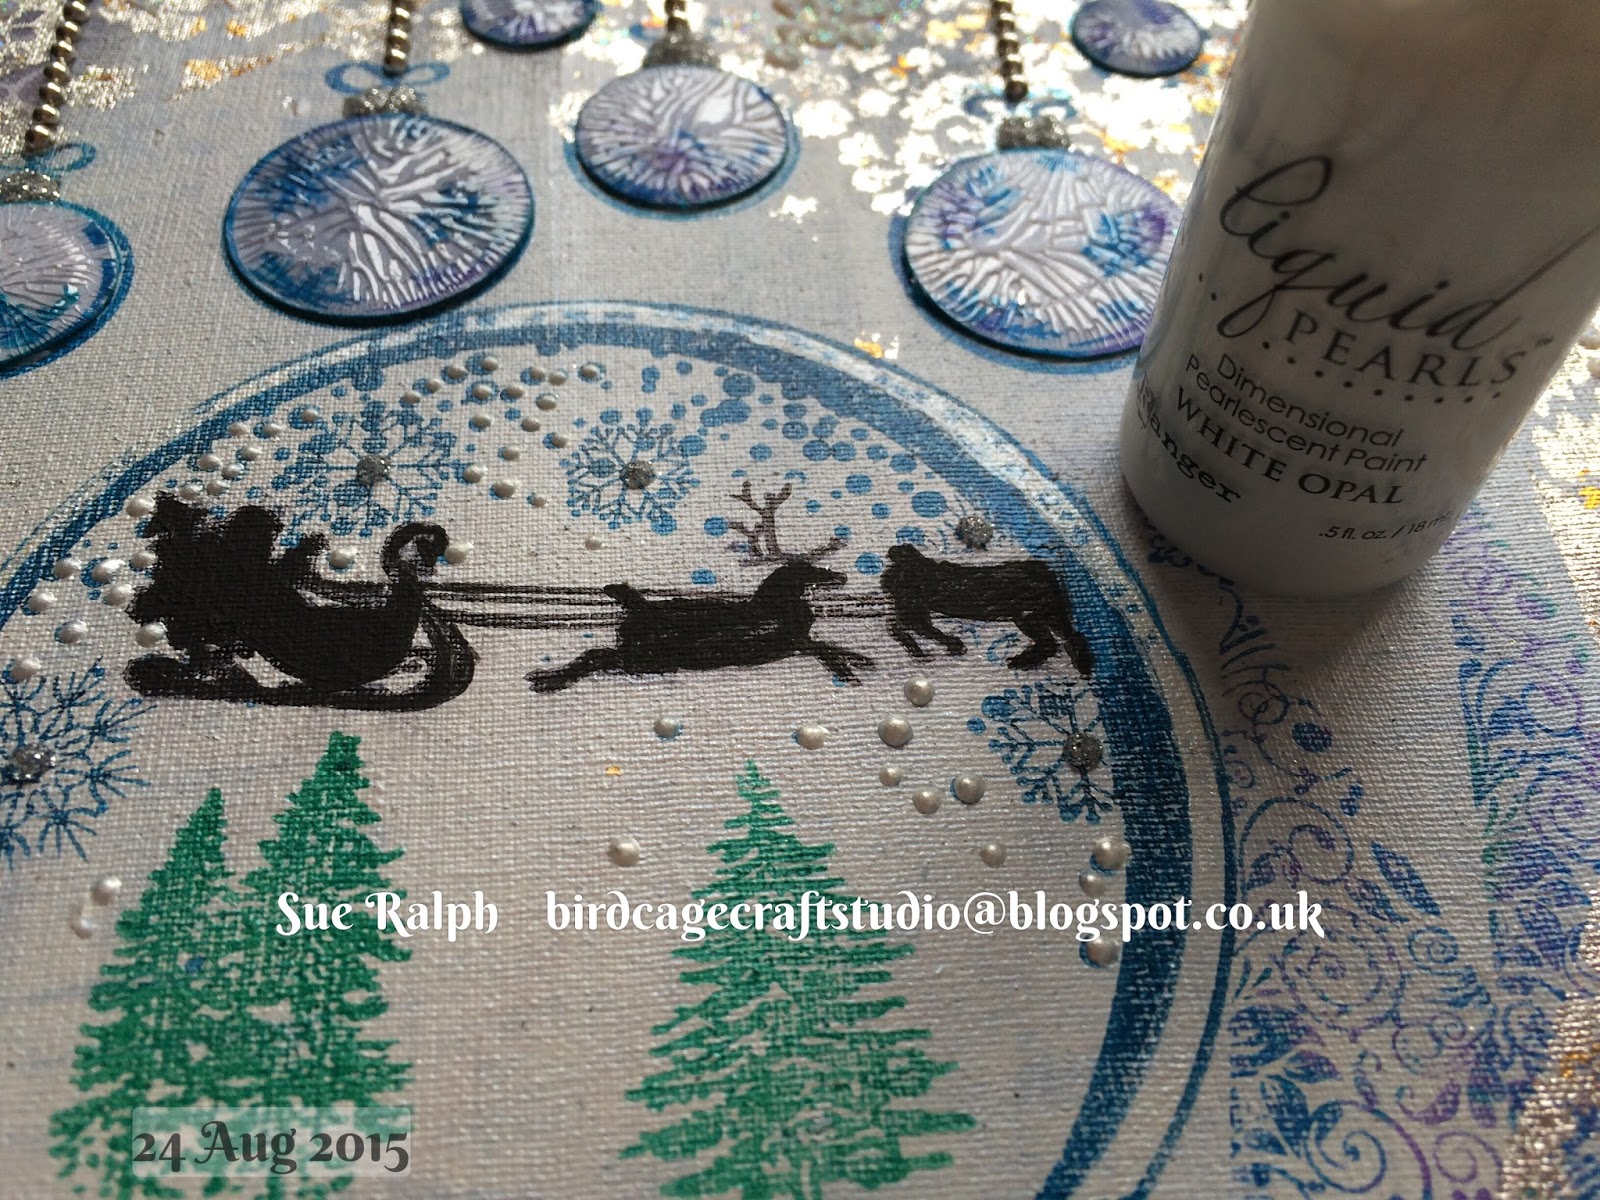

Inside the Globe I added some falling snow with liquid pearls and cut out a larger Christmas tree to go over the top of the second reindeer (No photo of this yet), added some false snow and cut out a piece of acetate to go over the globe! Once the acetate was in place I then went around the edge of it with Diamond Ice Stickles.


I stamped out another base for the globe out of card, made a couple of paper clay embellishments, decorated these with paint and Mega Flakes.


 To finish off this creation I tied on some sheer white ribbon to make a large bow at the top of the hoop covering the tightening screw.


Thank you again for joining me today, I hope this has given you some inspiration to have a go yourself.
Happy Crafting, xx


Saturday, 30 May 2015

Multimedia Picture- I was sure you could not be so Beautiful.


Good Morning all, beautiful day here in Gloucestershire!
My youngest daughter is off enjoying her 21st Birthday surprise weekend away and as the IndigoBlu Stamp Dianne reminds me so much of her I thought I would show you a Multimedia piece I have been working on!

I had an idea in mind as to what I was going to do around the stamped image of 'Dianne' and the more I progressed, I added a few more techniques. Let me show you what I did!


To start off with, I choose a 12"x12" Paper from one of the New Mixed Media Papers Vintage from IndigoBlu and the Rugged Edge stamp set. This set has 4 stamps and I used long 'splat' stamp with white embossing powders to create a little texture along the sides of the paper then used the 'stitches' stamp with pumice stone distress ink to add a little more depth to the paper! (you may have noticed I don't have a long enough stamping block for this set, but my Sizzix cutting plate worked wonderfully well)!

                                 
The next step was to use more texture on the paper so I brought in some texture paste and a Flourishes Stencil which I added to 2 of the corners along with a dots stencils randomly added across the page! Once the paste was dry I then added some paint drips watering down some of the Goldfinger and Aladdin metallic paints. I then went in with a couple more paints and the honeycomb stamp from the rugged stamp to add a bit more detail!


I stamped the 'Dianne' image onto white card with StaZon ink then painted the hair with Goldfinger paint and added brown highlights with a brown marker! Before sticking the image down I added a doily and strips of  thin jute ribbon underneath the image. The doily was a bit too white so I rubbed a little Aladdin paint over it!
I had some plain white, petals in my stash in a couple of different sizes so out came the paints to bring them to life! Some homemade embellishments were made using SU simply pressed clay then added to the center of the petals. Peppermint Tea, and Goldfinger paint were used to colour them! (using the clay I also made a couple of flourishes, a bow and a small boarder for and painted them once dry with Aladdin paint and used the Goldfinger paint to highlight them). 


I went on to add a few more paint splashes, Bakers Twine and flat backed pearls.  
To finish off this piece off  I stamped out a sentiment from 'Mr Darcy' several times and punched out each line and added the punched pieces to the picture.
This was lots of fun to make and I learnt quite a few things along the way!
Thanks for stopping by today. See you again soon. Sue xx