Showing posts with label Wall Hanging. Show all posts

Sunday, 5 June 2016

May.....All your Dreams come true - my challenge piece

Hello to you.
So I'm well and truly back from my travels around New England and have brought myself back some great crafty goodies, but I will tell you more about that in another post! 

 I needed a little nudge to get me back into crafting again and what better way to do that, than to enter the IndigoBlu Blog Challenge, so I have!
How about you?
 Why don't you have a go at this challenge, you might even win a fab prize. 
Check out all the information here.
Good Luck and have some crafty fun! xx

My idea for this challenge changed quite a lot and I needed to pin something down so I took a look again at my IndigoBlu stamps to get some ideas. I then went on to thinking about dreams, which then lead onto dream catchers, then I moved onto day dreams and how time slips by when lying in the sun day-dreaming (or thinking about challenges lol) and I ended up thinking about the 'Mr Darcy' stamp set I have.
And after all that thinking, this is what evolved.
What do you think??
So, first things first.
I painted a background with some of the Cottage Garden Acrylic paints from both the Metallic and Matt paints.Trying to get those colours you get when blowing bubbles.
I mixed up a runny paint with a few of the colours and let them drip down the card. Once this was dry I painted over the entire piece of card with the 'Snow White' paint.
Once the paint was dry I then stamped with the Bubbles stamp and sprinkled it with some Stampendous shabby blue embossing enamel.
I wanted to add some extra texture so I used the clock face mask and some 3D gloss gel mixed with a little Kingfisher paint.
I then stamped out several black images onto acetate circles to give the illusion of bubbles, used some different colour paints to make them come alive a little.

I felt the 'Bubbles' need a little shine so I went around each of them with some Mega Flake.
I haven't shown it here but I added some glitter glue and gems to the bubbles.

I felt that this project was beginning to look like a wall hanging so thought I would use one of the Tim Holtz wall hangers I brought home with me but felt the colour of it wasn't quite right so covered it with embossing enamel
I also added a Tim Holtz 'Word Band' to the hanger.
Before I glued down the 'Bubbles' I moved them around the hanger to see how I liked them the most.
I felt the hanger was a little plain so added a small seam binding bow.

Below are a few close ups.
I hope you have enjoyed following my journey into creating this wall hanger.

Hope to see you here again soon.
Happy Crafting,
Sue xx


Thursday, 14 April 2016

Yellow, Pink & Green. This months Theme for the IndigoBlu Blog Challenge


Hello there crafters.
So i'm back home and what better way to get back into crafting than to join in with this months blog challenge from IndigoBlu.

But just before I go onto that, have you heard, or seen the latest releases from IndigoBlu?
If not, head over to their web page. Lots of new goodies on offer from stamps, papers, paints and the new Diamond Resin. (Mine came yesterday so watch this space)!
Now that I have told you about the new goodies lets move onto this months challenge.
I'm calling this piece

Spring-New Beginnings 
(I made Top 3 in this months Challenge)


My thoughts behind this piece was to keep it fairly simple with the Stamp 'Colour Me - Daisy' being the focal point. 

Here's a list of crafting items I used in this project (Mostly IndigoBlu supplies)

*White & Black Card Stock
*Colour me Daisy Stamp
*Stylised Flowers Stamp
*Mega Flake-Sheffield Steel & Flitter Glu
*Yellow & Pink water based (Stampin Up) Ink's (+baby wipes)
*Butterfly Stamp & Punch (Stamping up)
*Distress Inks
*Cinderella & Lemon Meringue English Cottage Paints
*Crystal effects, Stickles, Enamel Accents
Wooden laser cuts, small pearls

Let me show you through these photo's how I achieved this look.

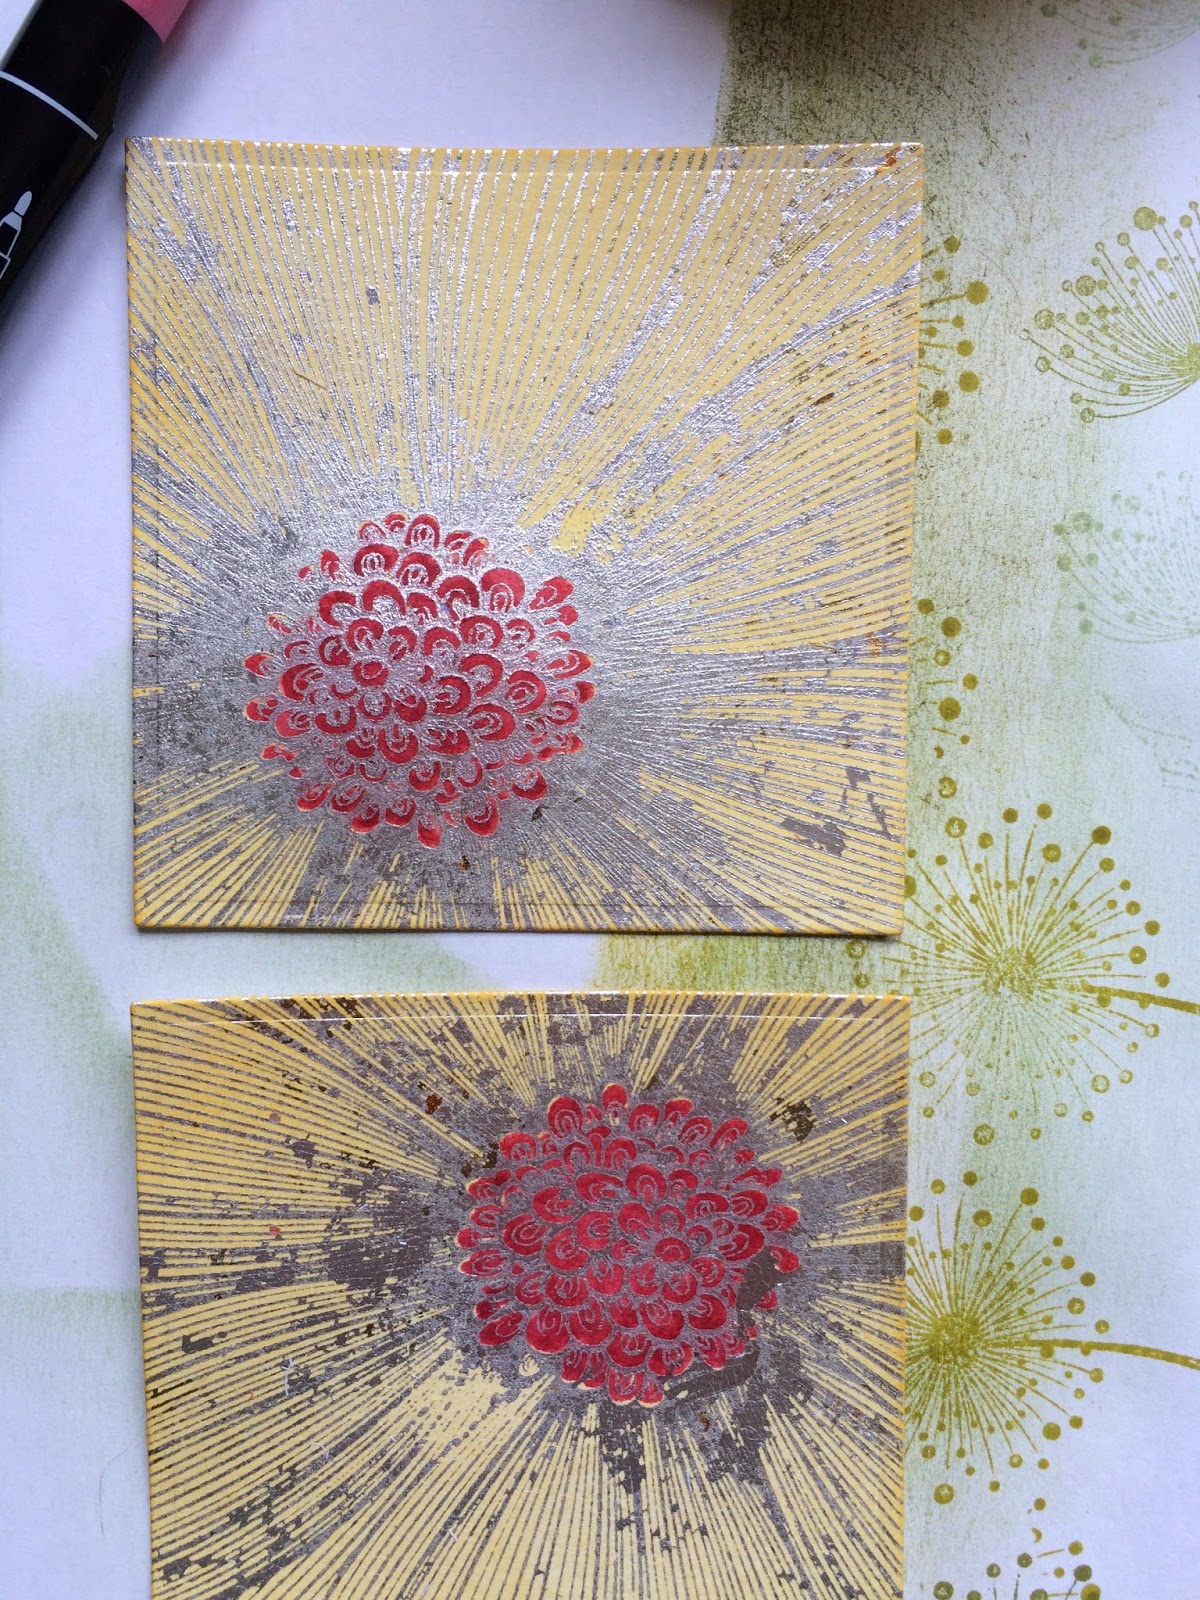
Using the Flitter Glu I stamped out four images of the Daisy onto white card

 I then covered them with Sheffield Steel Mega Flakes
Using a water based Ink I coloured two of the squares with yellow ink using a sponge, then went on to use Pink ink on the other square.

When the ink had dried a little I went over the images with a wet wipe to take some of the colour off the mega flake image.
I also stamped some butterflies in the same colour inks and punched them out to sit on the squares.


In this photo I have sponged the white card with four shades of green Distress inks then used two of the darker shades to stamp images from the Stylised Flowers. I did cut the flowers apart as I only wanted to use two of the flowers.


Once I had finished the stamping I splashed a little cold water over the panel then used a piece of  kitchen paper to pick up the water droplets which took away some of the colour on the panel.

In this shot you can see I have added colour to the center of the Daisy. 


Once each center of the Daisy had been coloured, I added Glossy accents over the pink center Yellow Square) and stickles over the yellow Daisy center (Pink square).

I then glued the two yellow squares to the green panel, one at the top the other at the bottom and mounted this on a piece of black card edged with Mega flakes.


 I wasn't happy with the look of it at this stage so decided to get out another piece of white card and paint the edges with Cinderella Metallic paint to bring out the pink in the squares and butterflies more.
The green panel was glued onto this piece.


 I then found some wooded laser cutouts from my stash and painted these, first in white Gee-Soo Good then one of the New colours from the English Cottage paints 'Lemon Meringue'.


 Once the paint was dry out came the Flitter Glu and Mega Flakes again.


 The wooden, cutouts were the glued to the top and bottom of the pink panel.
Can you see the 'lemon Meringue' paint showing through the insides of the wooden pieces? 


 To finish off this piece I added dots of Enamel accents & Ice Stickles to the stamped flowers and tiny pearls to the butterflies.

I hope you have enjoyed seeing my latest project, please drop in again to see what I come up with next time with my new IndigoBlu goodies.
Take care & Happy Crafting xx

Just a couple more close up photos below