Showing posts with label Making your own flowers. Show all posts

Thursday, 4 June 2015

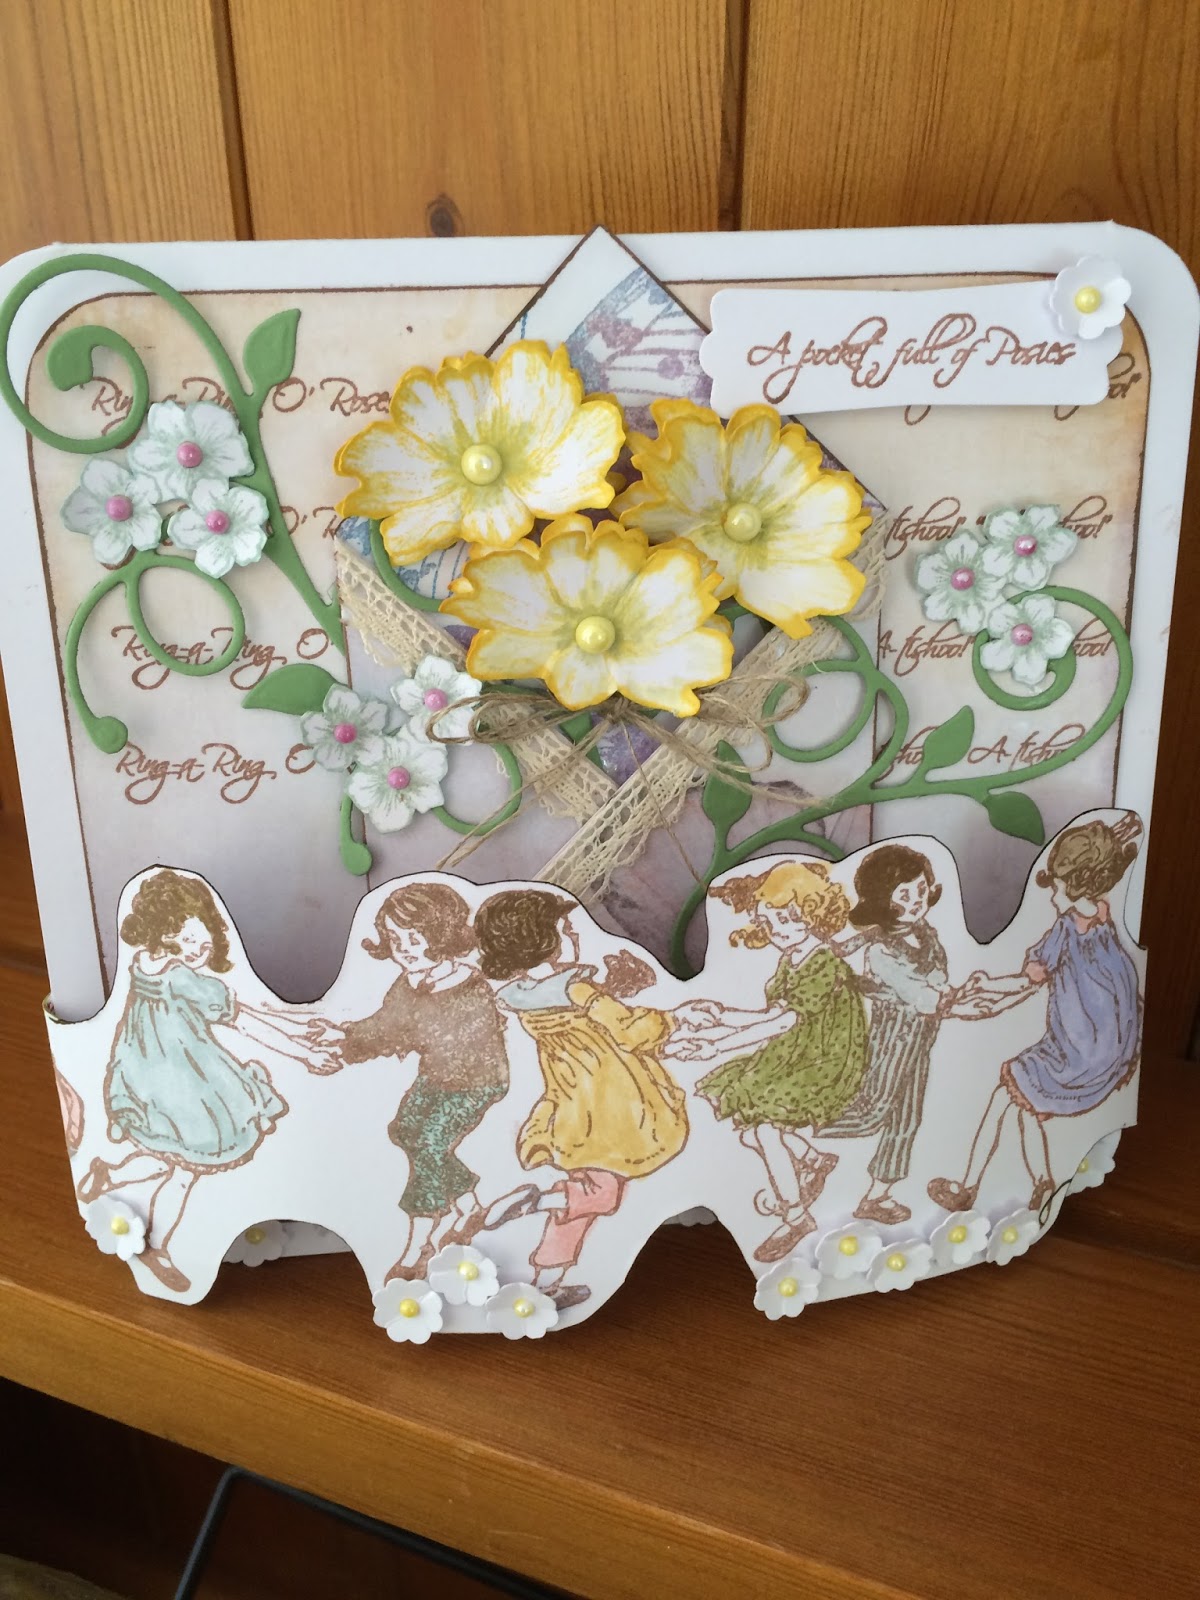
Pocket full of Posies - IndigoBlu Blog Challenge

Good Morning / Afternoon,
Do you remember the Nursery song 'Ring a ring of Roses, a Pocket full of Posies'?
Well I decided to use this as the inspiration for my entry into the IndigoBlu Challenge this month! Why not take a look at the other entries and have a go yourself!


To start with, I chose a couple of pieces of backing paper from the New Mixed Media Paper 6x6 pad collection Flights of Fancy, 


I stamped the nursery rhyme lyrics onto this piece from the Vintage Nursery Rhymes Stamp Set and rounded the corners off then attached it ti a card blank. I then went ahead and cut diagonally along another piece to make a 'Pocket' for the Posy to sit in. I used the Flutterby Dinkie to decorate the inside of the pocket.


Ribbon was then added to highlight the folded paper pocket and attached to the center of the card. I used the stamp sets, Dancing Children and 'Live Laugh Love' and the small flowers off the Giant Peony Stamp for the main focus of the card along with some die cut leaves, tiny punched out flowers, pearls that I coloured in to suit the tone of the card and some Linen Thread to tie the 'Posy' together.
Once I had coloured in the Dancing Children I cut around the image and to add a bit more dimension to the card, I attached the image either side of the card to give it a slightly domed look! (The card fits inside a gusset type envelope. When I send it out I will put a piece of bubble wrap under the dancing children to stop it from getting flat)



I now have the nursery rhyme floating around in my head! 
Bye for now,

& Happy Crafting, 
Sue xx

Saturday, 30 May 2015

Multimedia Picture- I was sure you could not be so Beautiful.


Good Morning all, beautiful day here in Gloucestershire!
My youngest daughter is off enjoying her 21st Birthday surprise weekend away and as the IndigoBlu Stamp Dianne reminds me so much of her I thought I would show you a Multimedia piece I have been working on!

I had an idea in mind as to what I was going to do around the stamped image of 'Dianne' and the more I progressed, I added a few more techniques. Let me show you what I did!


To start off with, I choose a 12"x12" Paper from one of the New Mixed Media Papers Vintage from IndigoBlu and the Rugged Edge stamp set. This set has 4 stamps and I used long 'splat' stamp with white embossing powders to create a little texture along the sides of the paper then used the 'stitches' stamp with pumice stone distress ink to add a little more depth to the paper! (you may have noticed I don't have a long enough stamping block for this set, but my Sizzix cutting plate worked wonderfully well)!

                                 
The next step was to use more texture on the paper so I brought in some texture paste and a Flourishes Stencil which I added to 2 of the corners along with a dots stencils randomly added across the page! Once the paste was dry I then added some paint drips watering down some of the Goldfinger and Aladdin metallic paints. I then went in with a couple more paints and the honeycomb stamp from the rugged stamp to add a bit more detail!


I stamped the 'Dianne' image onto white card with StaZon ink then painted the hair with Goldfinger paint and added brown highlights with a brown marker! Before sticking the image down I added a doily and strips of  thin jute ribbon underneath the image. The doily was a bit too white so I rubbed a little Aladdin paint over it!
I had some plain white, petals in my stash in a couple of different sizes so out came the paints to bring them to life! Some homemade embellishments were made using SU simply pressed clay then added to the center of the petals. Peppermint Tea, and Goldfinger paint were used to colour them! (using the clay I also made a couple of flourishes, a bow and a small boarder for and painted them once dry with Aladdin paint and used the Goldfinger paint to highlight them). 


I went on to add a few more paint splashes, Bakers Twine and flat backed pearls.  
To finish off this piece off  I stamped out a sentiment from 'Mr Darcy' several times and punched out each line and added the punched pieces to the picture.
This was lots of fun to make and I learnt quite a few things along the way!
Thanks for stopping by today. See you again soon. Sue xx


Sunday, 26 April 2015

My Card Swap Shares!


Happy Sunday Everyone!
I have a couple of cards to share with you today. 
The first card is one I  made for last months Swap Group I run on Facebook and it was all about 'BLING'! 
We also had to make a card that has its own stand!
Well, i'm not really a Bling Girl, but this is what I came up with. I was quite pleased with the way it turned out in the end!
(Next months Challenge is using those free Paint Chips you can get home decorating stores. Why not pop back and check out my ideas)!


Making the Card Base!
Back of the card!


Close up of the 'Bling'

OK, now onto the 2nd Swap!
This month we had to create a card using Neutral Colours as a tribute to a lady who sadly passed away and who used to love these colours. Also it would have been Margaret's birthday this month!


Side View of the Card
Close up on the front of the card!


Front View of the card 

Thanks for stopping by. 
Come back tomorrow for my Video tutorial on how to put the above card together for yourself!
Happy Crafting xx