Showing posts with label IndigoBlu Stamps. Show all posts

Sunday, 21 January 2018

Trying something new for me - ATC Swapping

Hello there. I thought I would write a quick blog post to share with you my latest crafty makes,  ATC's (Artist Trading Cards).  
The Junk Journal Junkies and Mindful Art group on Face Book runs one each month and now that my partner has received her cards I can share them with you.
Although I have seen these type of cards before I haven't made or swapped them before and I have found them to be a lot of fun to make.
. You work on quite a small size card 2 1/2" x 3 1/2" so its not as daunting as working on a larger blank surface.
The theme was the letter E and you could use any products you like to create your card.  
I choose to make 3 to start off with, but some people in the group can make up to 6. 
I thought I would make 3 completely different cards but I know some people like to make up a Master board (of A4 / A3 size card) of paint and stamped images then cut it up as the  base for the ATC and use slightly different embellishments or stamped images to decorate.

 Here are my  ATC's for the letter 'E'
 Top ATC- I was just going to do a mini Envelope but then thought why not make it an Easel ATC as well.Then 'E' for Elixir and 'E' for Engagement. I even made a little pink diamond ring.

Here are some close up of the ATC's.
For this one I had used Rice paper decorated with inks and stamped images. On top of that layer I stuck down some stamps and stamped images over them. I made a tiny envelope out of vellum and ran it through an embossing folder. As I had made this into an Easel ATC so I stamped and punched out flowers to make a Stop for the card.


I first of all decorated the base card with embossing paste and dripped pink and silver paint over the card. Once dry I added some ribbon to the bottom half then stamped out an image of a couple and sentiment. White and silver thread was wrapped around the image and tiny painted punched out hearts were placed down the side. The engagement ring was made out of a  jump ring and a glass bead.


Coloured blocks of inks decorated the first layer on this ATC. I then built up further layers using some G45 papers, cut out and coloured two bottles then made the middle bottle out of acetate which I coloured and added glitters on the inside of the bottle. I found a label with the word 'Elixir' and attached it to the bottle.


I hope you have enjoyed taking a look at my latest makes. Thank you for popping by and if you have enjoyed seeing my crafts please subscribe to my blog so that you get updates of when I post.
Have a great week,
Happy Crafting, Sue xx


Wednesday, 21 December 2016

Thinking of Snow. Inspiration for the New IndigoBlu Blog Challenge.

Hello Everyone, so how are your Christmas preparations going? Hopefully better than mine, as usual everything seems to be left to the last minute but at least I have a few more days to sort those things out. 
Onto, today's blog post. 
I would like to share a little piece of home decor with you which fits in with this months IndigoBlu Blog Challenge of Snow, Snow, Snow.
I wanted to create something with a winter feel and of course snow, but not to Chrismasy so came up with this!

 To start off I painted the wooden heart with white GeeSoo Good then once dry painted it with the Blue Luscious Powder mixed with water then went over the top of that with the Teal Luscious powder, again mixed with water to form a paint.

 Once the paint was dry, I stamped the image of the large snowflake onto the heart with Flitter Glu then brought out the images with Sheffield Steel Mega Flake. I also stamped out onto white card Holly leaves which were cut out and painted with the Green & Teal Luscious Powders which I mixed into Glossy Slap-it-on to give the leave a waxy look.

 Red Gems were added to the wet paint for Holly Berries

 Next I used the Robin Stamp, stamped onto white card then coloured in using watercolour pencils and Frosty Sky English Cottage Paint.This image was cut out without the apples and leaves.

 For the look of lightly fallen snow I went around the leaves and the branch with some glue and added Unicorn Sparkles.

 White Ribbon was added to the top of the heart and a sentiment was added as a final finishing touch.

I hope you have enjoyed taking a look at this project and it has inspired you to get your IndigoBlu stamps out and have a play. This challenge lasts through January so once Christmas has come and gone and you find you have a little more time on your hands I hope you join in the challenge.
Check out the IndigoBlu blog for more of the Design Team's creations and also the online shop.

Merry Christmas to you and have a Happy and Healthy 2017.
Happy stamping, Sue xx

Friday, 21 October 2016

IndigoBlu October Blog Challenge- Monochrome

Hello Everyone, are you ready to challenge your crafting skills, need a little inspiration?
Today is the start of a Brand New Challenge over at IndigoBlu - Monochrome!

I knew what monochrome was but wanted to find out the correct definition so googled it and this is what came up!
Monochrome:- A photograph or picture developed or executed in black and white or in varying tones of only one colour.
So for this post I decided I would use Black & White, only because I don't normally craft in these colours and wanted to challenge myself. For the reminder post of this challenge later in the month I will  be using a colour.

So here are a couple of cards I made, hopefully inspire you to have a go yourself!
What do you think?.......................................

So if you would like to have a go yourself here is a quick tutorial for you.
1. Cut six card panels (3 white/3 black) 3 1/2" x 2 1/2" and round off each of the corner. Paint the 3 white panels with white GeeSoo good, and the black panels with black GeeSoo good. I wanted to give the panels a matte look.

2. Once the panels are dry, stamp the images using White GeeSoo Good onto the black panels and Black Versafine Ink on the white panels.
(when using Gee-Soo good to stamp with, spread some onto a piece of phat foam until it has been worked into the foam and use it like an inkpad).

3. To add detail to the now dry images I used Black and White Enamel Effects and some white and black thin ribbon on 2 of the panels. I also stamped out a white and black butterfly for a little 3D effect on the lilac.

4.The white panels were then mounted onto black card and the black panels onto white card. They were then mounted onto a white card blank.


And there you have it, two Monochrome cards. I will add a sentiment when I need a card in a hurry. Its always a good idea to have a few cards spare just in case!

Thanks for checking in today. Catch up with you again soon. xx


      Ickle Poppy A6 Red Rubber Stamp            Floral Fantasy A5 Red Rubber Stamp                        Stylised Flowers A6 Red Rubber Stamp


 Gee-Soo Good (White) Gesso Paint                                   Gee-Soo Good (Black) Gesso Paint         


Wednesday, 21 September 2016

IndigoBlu Inspiration Piece for the September Challenge - Autumn Wildlife

Hello to you. September is now well and truly here but the weather is doing some strange things here in the UK. As I am sat here writing this we are having a mini heatwave. Not sure how long it will last though.

Its that time for the New Challenge over at IndigoBlu, why not check it out and enter one of your creations. Check it out here!

Well I really wasn't sure what I would create for you this time round, so I turned to Pinterest for some inspiration and found a card, which was made for Halloween with a 3D pumpkin on it and that triggered an idea in my head, so thank you Marlene.

To start this canvas off I did a background wash using Gold and Bronze Luscious Powders mixed with water and whilst that was drying I used a brick die to cut out parts on a piece of Kraft card stock then used a couple of the images from the "Hocus Pocus" stamp set.

I added a layer of painted cardboard and Burlap.

 The main image from the stamp set was stamped and coloured in with inks and paint.

I painted a white piece of card with Burning Bonfire English cottage paint and went over it with one of the New Stencils, "Damaged Dots" and Pheasant Bronze (Metallic). Dies were used to cut out five circles to make the 3D Pumpkin. 

Green card was cut and curled to make the top part of the pumpkin.

Spiders from the stamp set were stamped onto acetate.

Embossing paste was mixed with some Gold Luscious and put through the Diamond and Laurel stencil layered over the Kraft card.


Embossing paste was used again, mixed with Hunter Green paint and used straight onto the canvas and also onto white card with the Laurel leaves stencil. Once the leaves on the card was dry I fussy cut them out and painted over the top of them with Gold Luscious powder mixed with water.

To finish off this piece I added a sentiment from the same stamp set, silver thread, wooden toppers, burlap flowers, die cut leaves from the remaining painted card and gems.

I would love to think this piece has given you some inspiration to create something for yourself for this months Blog Challenge. 
Happy Stamping.
Sue xx

         
Hocus Pocus Stamp Set                        Luscious Powders                            English Garden Paints

   Laurel Leaves Stencil                 Diamond Stencil


Tuesday, 9 August 2016

Having fun with Slider Cards

Hello everyone,
I decided to create a few more sliding cards, not for any reason, just that I enjoy making them. 
(Have you tried making one yet, I find that men folk find them fascinating).

I'm not going to do a long tutorial on how to make either of these cards as you use the same technique I used on the Sliding Camera Card I shared on my blog a little while ago. I have now added that video to the end of this post!

Here is a quick video to show how these new cards work.


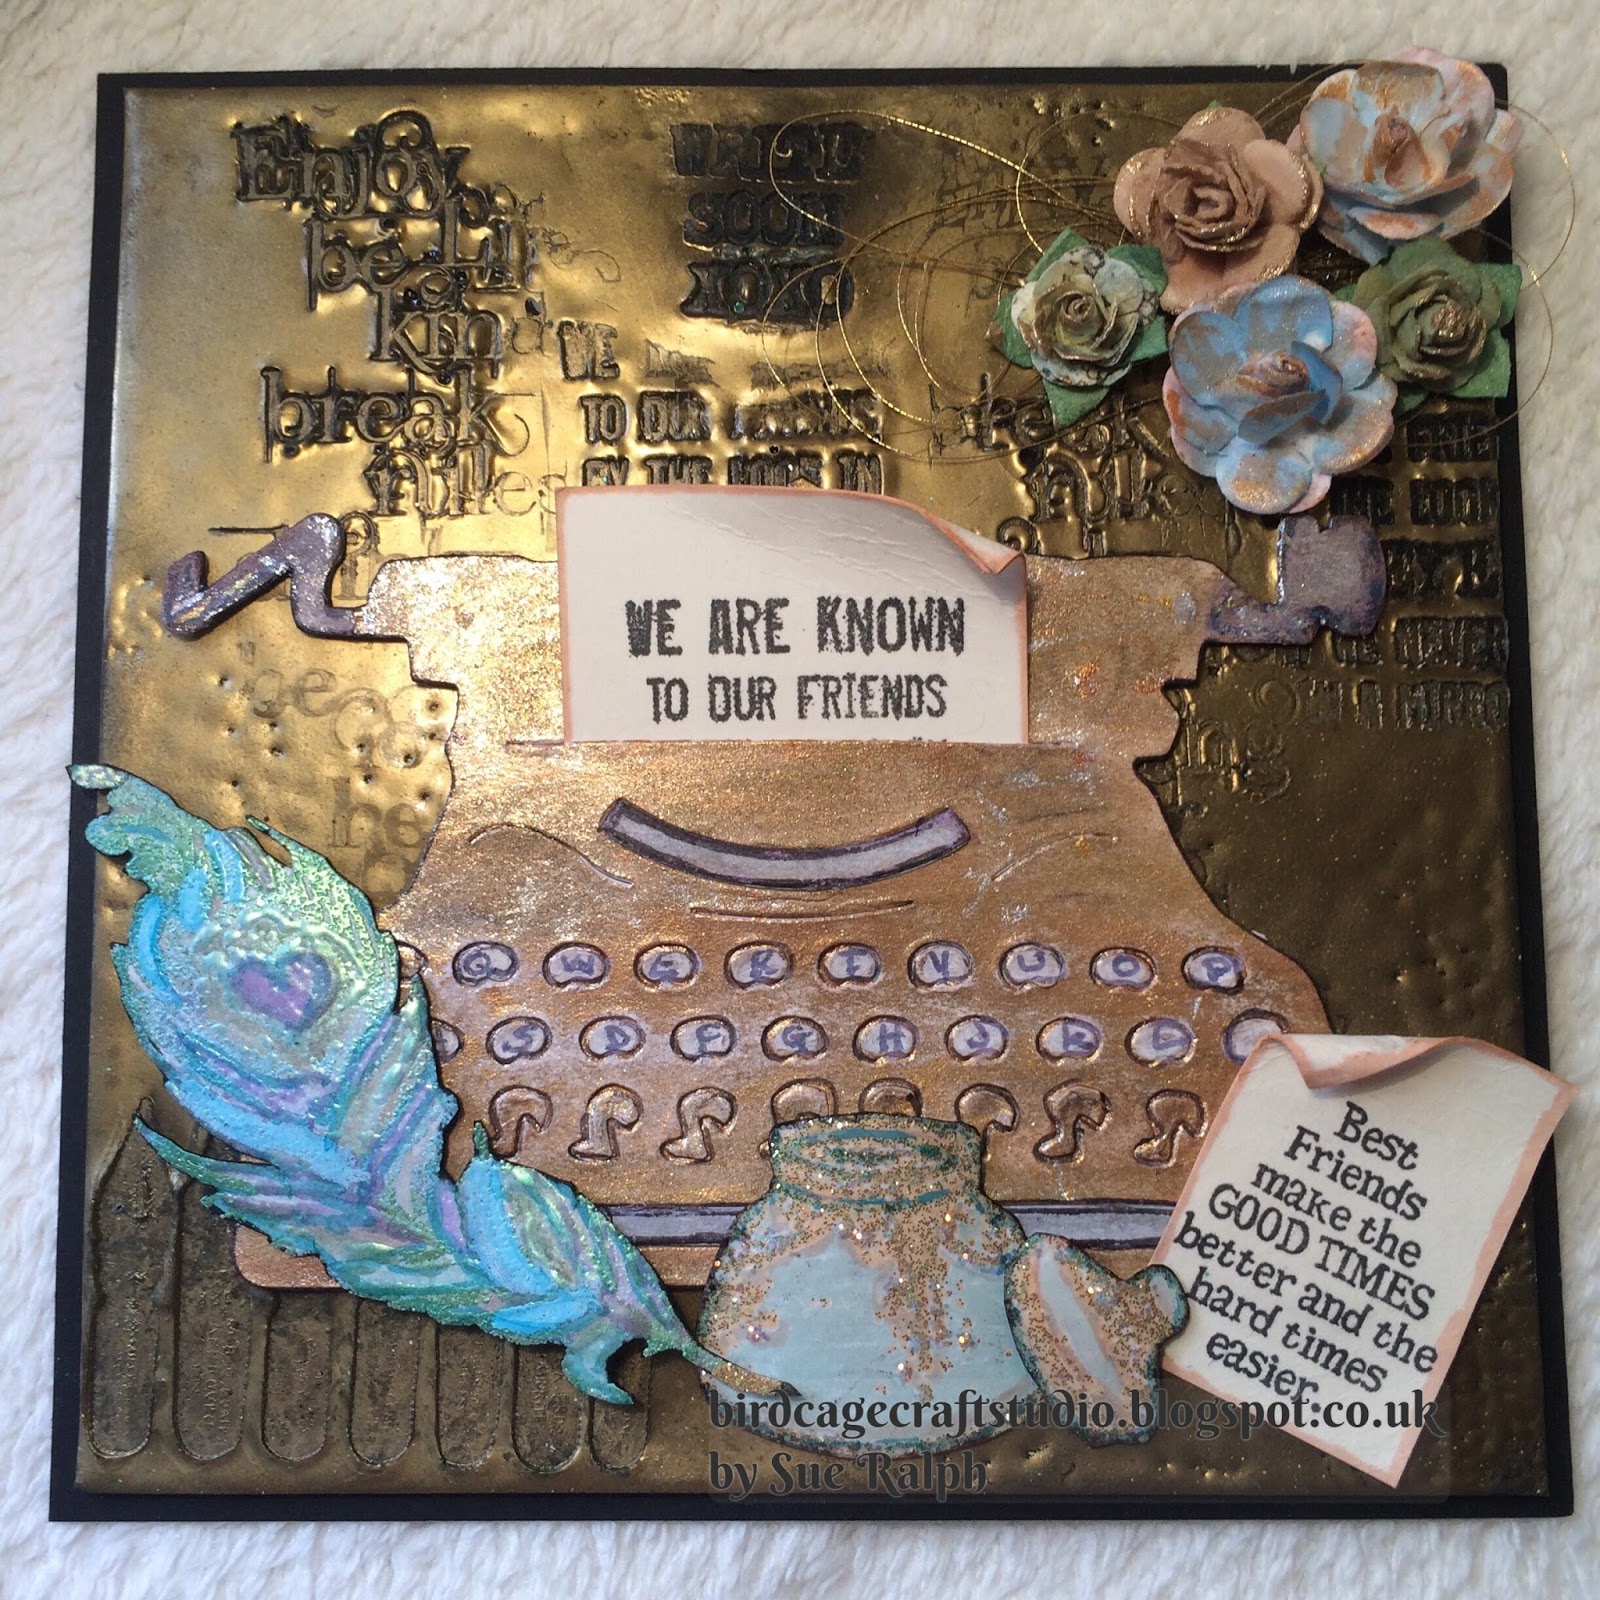
To start this card off I used the Tim Holtz Typewriter Die. I cut out a couple in different colours. The main typewriter was painted then I added the different colour card pieces into place and painted those to give a vintage look.
I then stamped out the sentiments, inked around the edges and rolled the top corner to each piece.
I cut out a piece of thick card for the backing of the typewriter and applied heated up several layers of gold embossing power on it, and whilst it was still hot pressed into it with several stamps to leave an embedded image.
I then went on to stamp and colour the ink-pot and quill.Glitter was then added along with gold thread and painted flowers.

                            "Enjoy Life"                                                           "Take the Time"


                                   "Plume"                                                               "Good Times"


Now for this card I used the Tim Holtz Telephone Die. 
I cut out three of the telephones using white card.
Each of the hand pieces were cut away from the main part of the telephone. Two of them were glued together to give them some extra strength, the third one was glued in place once I had attached the acetate message and cord.
I used the Raven Black Indigoblu Artist's Acrylic Paint to paint two of the telephone die cuts, the third one was kept white to fill in those little details. Some parts were painted silver.
The background was first of all inked with a brick stencil, then I used embossing paste with the clock face stencil. Once dry I stamped a boarder with one of the sound waves from the stamp set "Light & Sound Borders". A Police box image was used from the paper pack. 
The edges of the paper were distressed and inked in blue. I crumpled the paper to give it an aged look and painted over it with a watered down blue paint.
Because I wanted to create a sliding element to represent a voice coming from the telephone I stamped "Hello" onto a piece of acetate along with a small part from the sound boarder.
The card was finished off with three die cut no"9"s.


       "Lost Family - Mixed Media Paper Pad"                "Clock Face - Stencil"

                            "Word Block #1"                                        "Light and Sound Boards"

Well thats all for tonight. I hope you have enjoyed this post. Hope you come back soon.
Happy Crafting, Sue xx