Showing posts with label Birdcage Craft Studio. Show all posts

Tuesday, 9 August 2016

Having fun with Slider Cards

Hello everyone,
I decided to create a few more sliding cards, not for any reason, just that I enjoy making them. 
(Have you tried making one yet, I find that men folk find them fascinating).

I'm not going to do a long tutorial on how to make either of these cards as you use the same technique I used on the Sliding Camera Card I shared on my blog a little while ago. I have now added that video to the end of this post!

Here is a quick video to show how these new cards work.


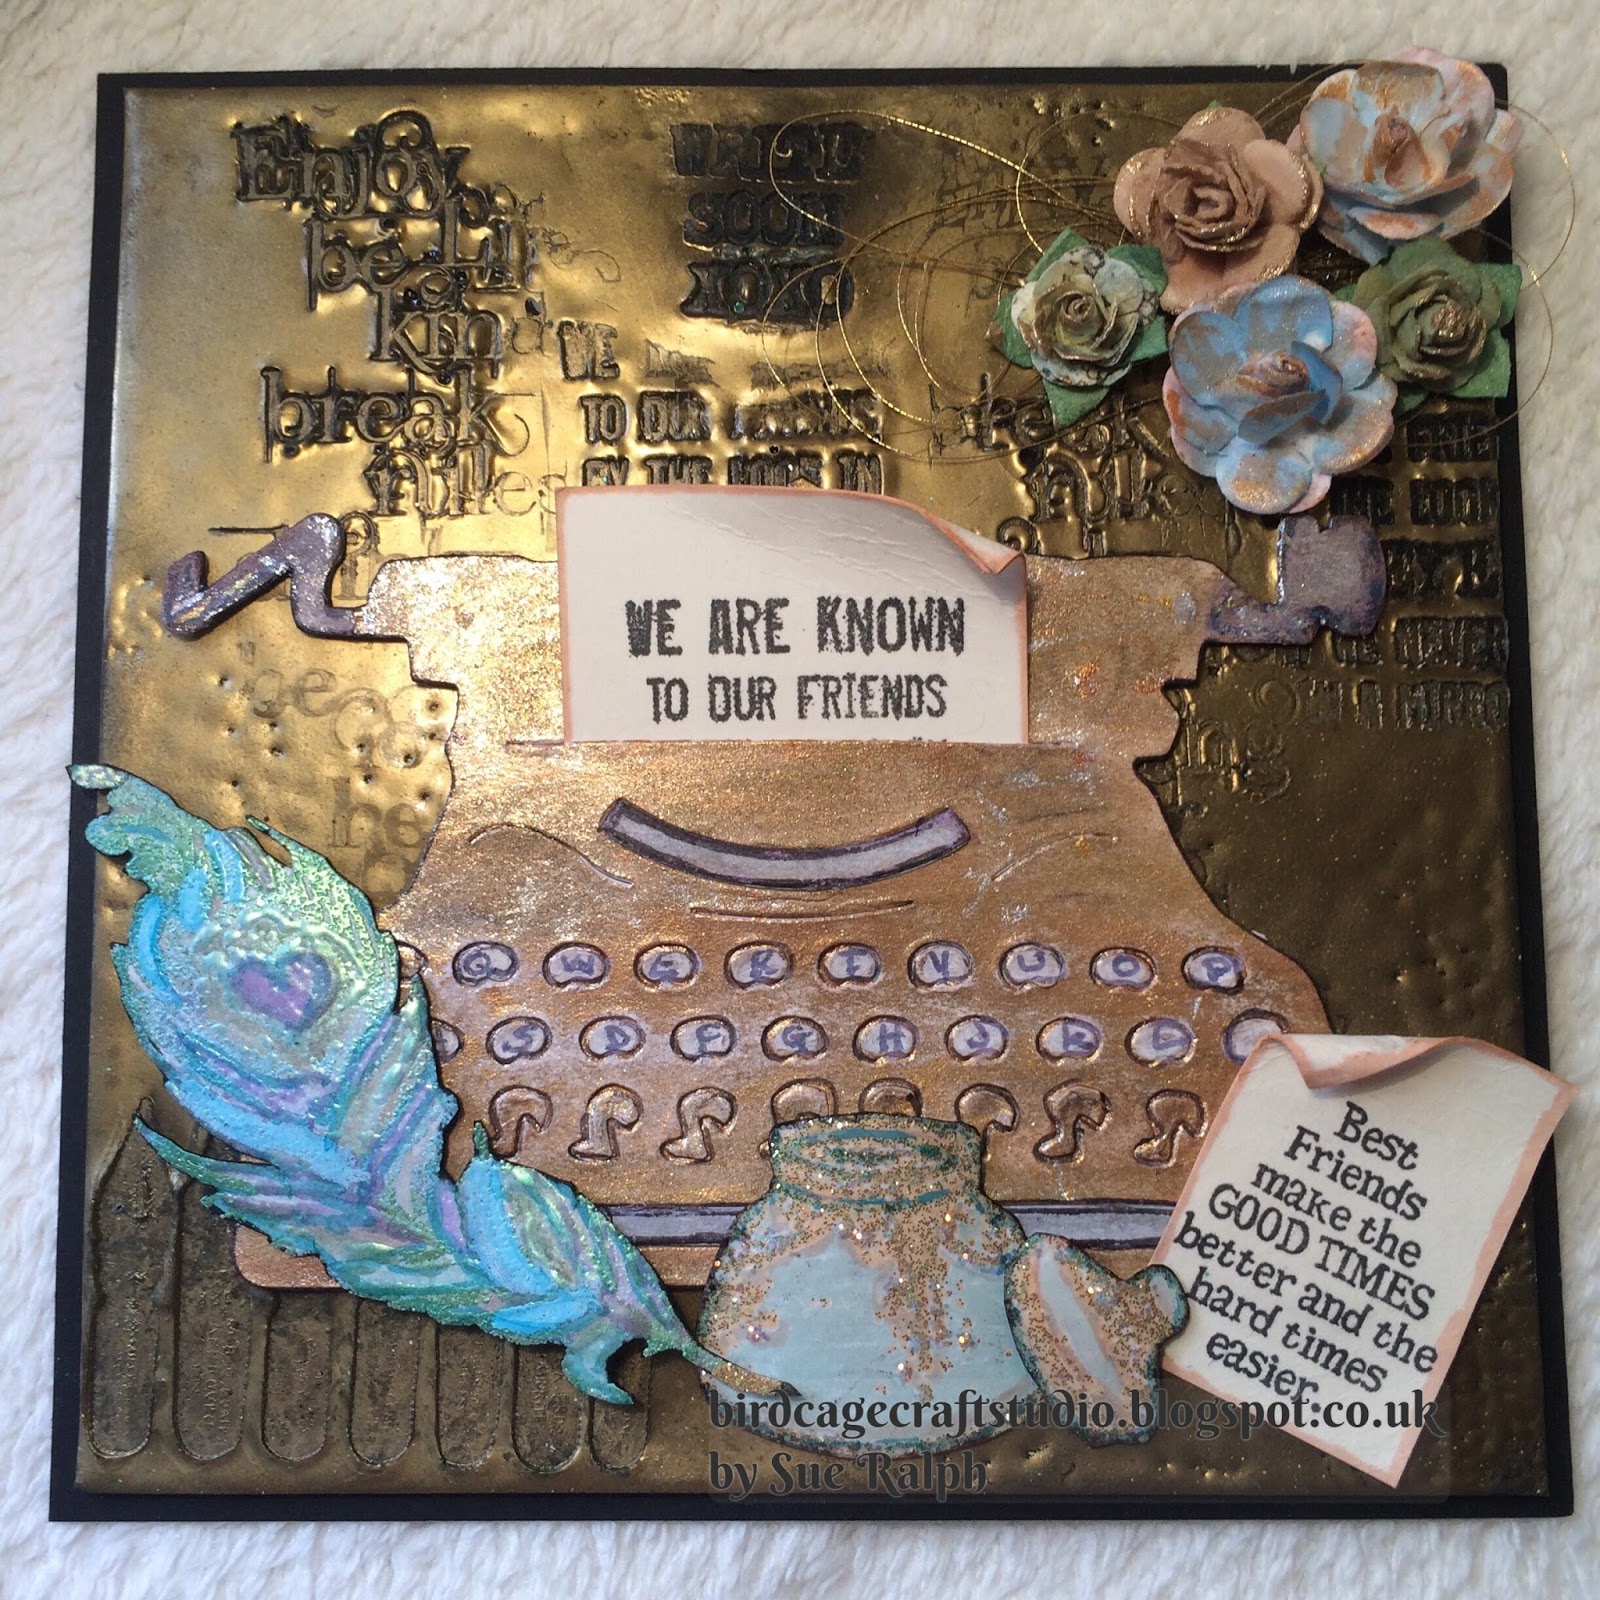
To start this card off I used the Tim Holtz Typewriter Die. I cut out a couple in different colours. The main typewriter was painted then I added the different colour card pieces into place and painted those to give a vintage look.
I then stamped out the sentiments, inked around the edges and rolled the top corner to each piece.
I cut out a piece of thick card for the backing of the typewriter and applied heated up several layers of gold embossing power on it, and whilst it was still hot pressed into it with several stamps to leave an embedded image.
I then went on to stamp and colour the ink-pot and quill.Glitter was then added along with gold thread and painted flowers.

                            "Enjoy Life"                                                           "Take the Time"


                                   "Plume"                                                               "Good Times"


Now for this card I used the Tim Holtz Telephone Die. 
I cut out three of the telephones using white card.
Each of the hand pieces were cut away from the main part of the telephone. Two of them were glued together to give them some extra strength, the third one was glued in place once I had attached the acetate message and cord.
I used the Raven Black Indigoblu Artist's Acrylic Paint to paint two of the telephone die cuts, the third one was kept white to fill in those little details. Some parts were painted silver.
The background was first of all inked with a brick stencil, then I used embossing paste with the clock face stencil. Once dry I stamped a boarder with one of the sound waves from the stamp set "Light & Sound Borders". A Police box image was used from the paper pack. 
The edges of the paper were distressed and inked in blue. I crumpled the paper to give it an aged look and painted over it with a watered down blue paint.
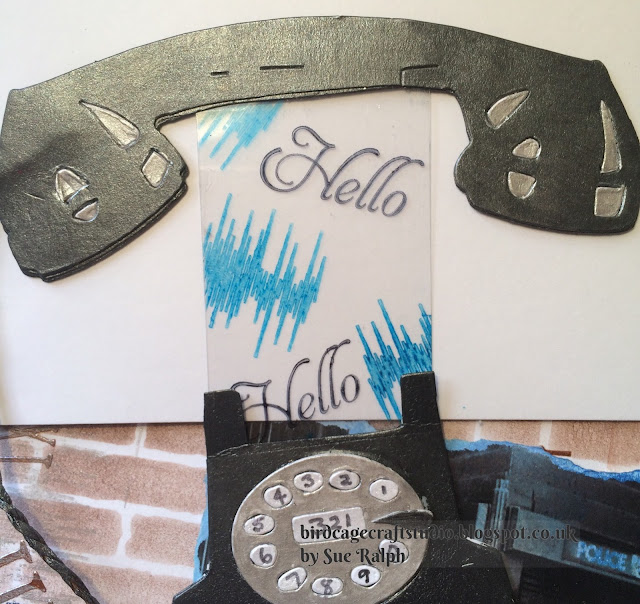
Because I wanted to create a sliding element to represent a voice coming from the telephone I stamped "Hello" onto a piece of acetate along with a small part from the sound boarder.
The card was finished off with three die cut no"9"s.


       "Lost Family - Mixed Media Paper Pad"                "Clock Face - Stencil"

                            "Word Block #1"                                        "Light and Sound Boards"

Well thats all for tonight. I hope you have enjoyed this post. Hope you come back soon.
Happy Crafting, Sue xx


Tuesday, 23 June 2015

Altered Art and a little Card Making - Boxed Notelets Set

Hello Everyone,
Thank you so much for stopping by to have a look at my latest project.


To start with, I had  purchased a small seed box a little while ago thinking I could "Do" something with it and when I purchased the IndigoBlu "Plume" stamp set I knew exactly what I was going to make!
Let me show you how I created the Boxed Notelet Set. 
(The main materials used to create this project were IndigoBlu).


This is the hinged box I purchased and I started the altered process by covering it all over with Gesso to prepare the surface for painting etc, then once this was dry I painted it all over with Sleeping Beauty metallic paint which has a wonder shimmer to it, then added Emerald City with a piece of scrunched up cling film over the still wet Sleeping Beauty to give the surface a slightly marbled look.


Whilst the box was drying I went on to make 6 small Notelets & Envelopes to put inside it!

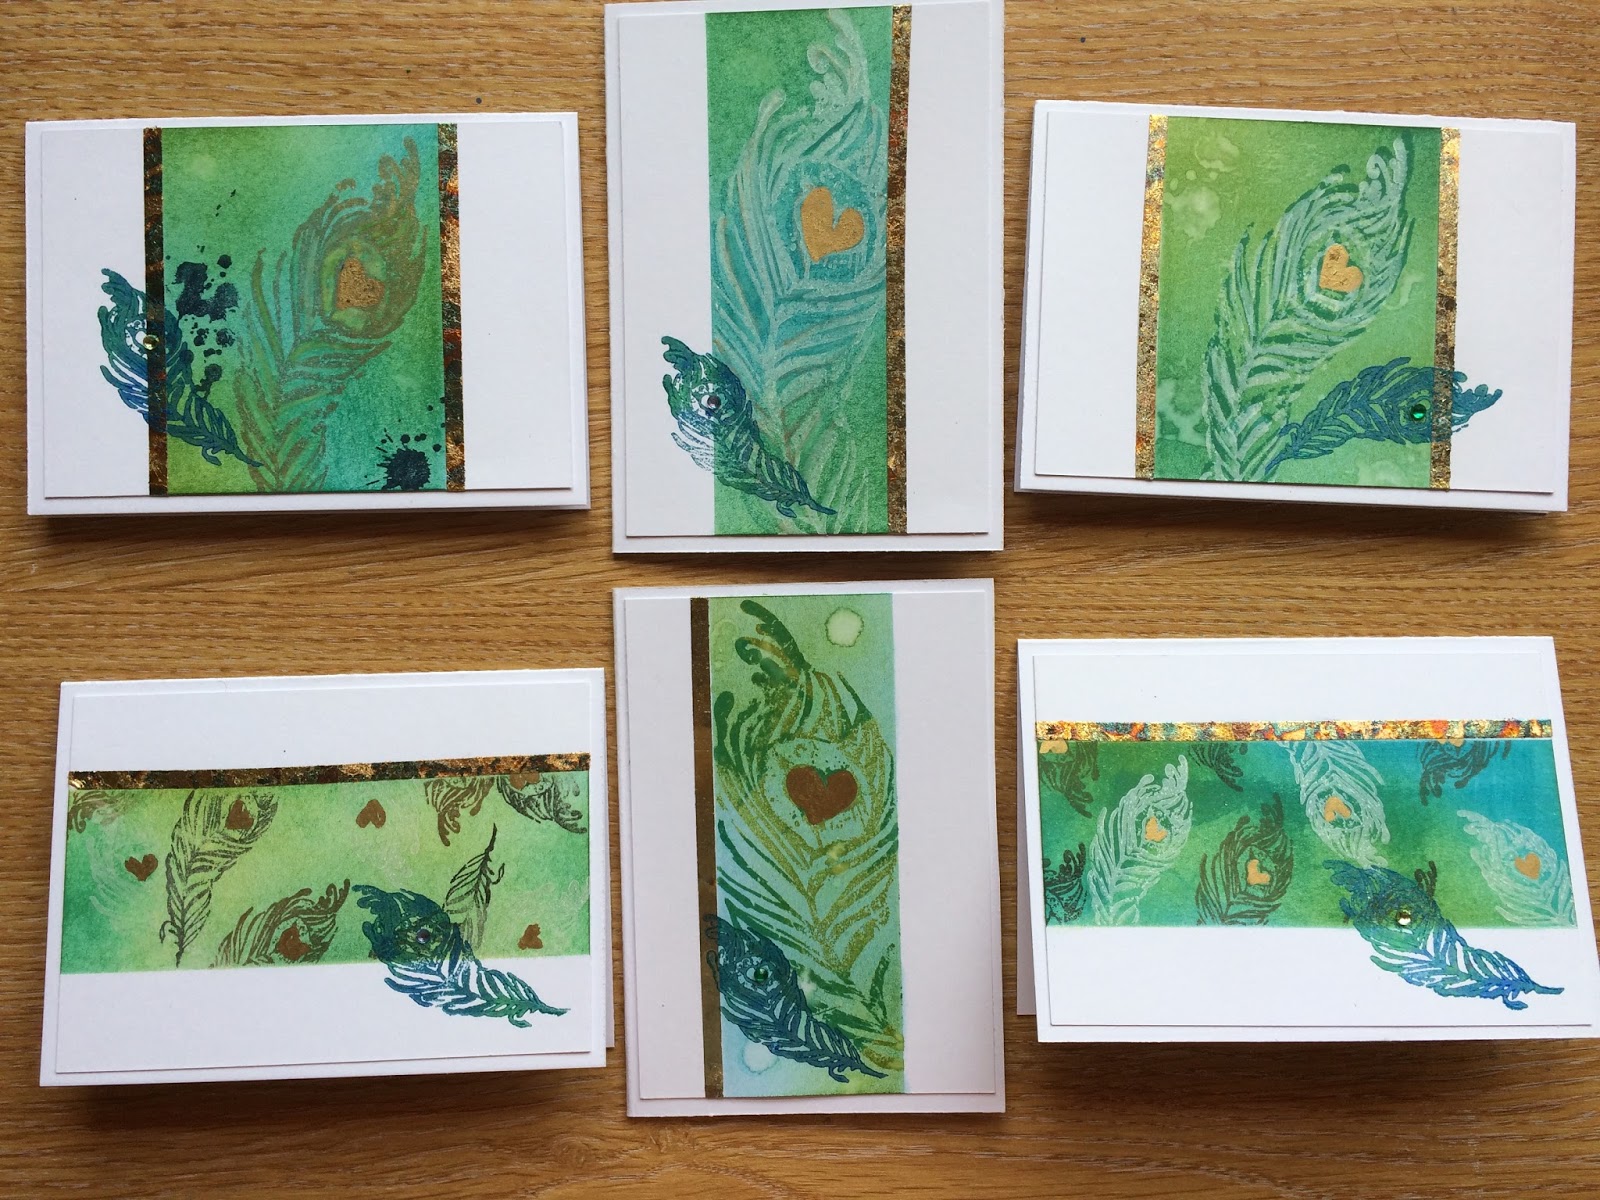
To make the Notelets I used the "Plume" stamp set.
I first of all used a couple of Green & Blue Stampin Up inks to create the background. I masked off sections of the white card then applied the inks using Ink Dusters

The idea for the stamped part of the design for the notelets came from someone who had posted on Pinterest, and I liked it so much that  I CASED the idea and added my own little twist to it.  
Once the background had been done I then used several of the Plumes (Feathers) as the main image on the notelets. I also brought in some white, sepia and black inks.

Using very thin double sided tape I added Megaflake to create a slight boarder.


Two different colours of Megaflake was used. Morris Dance & Yorkshire Dales. They give a lovely richness to the notelets.
 (Theses photos don't do the Megaflake justice really. Methinks I need to invest in a better camera)!


Once the paint was dry on the box, I then stamped more images of the larger feathers onto it with Flitterglu then added Megaflake. The Ink pot image was stamped onto the box using VerseMark Ink and Gold Embossing powder, then painted in using the Aladdin paint. This colour paint was also used to paint in some of the small hearts on the plumes.
I then went on to stamp the smaller feather onto some Vellum Card stock, added Megaflake then I cut them out and used Pinflare Glue Gel to attach them to the Ink pot as a 3D element. More gems were added around the box as well as a Latch to keep the box closed! I coloured the latch ( it was a brass colour) using a gold metallic permanent ink pen.


On the lid of the box I stamped the words, 'Create' and 'Art' using the Flitterglu and Megaflake again. I had some brass coloured metal embellishments in my stash, so used the gold pen to change the colour of them and attached then between the words.
      

 The finishing touches to the notelets were done by using a Gold pen to colour in some of the hearts, the paint came out again so I could stamp the small feather on each notelet and a gem was added to these.
Here is the final project, just waiting for a new home!

                                                                                                 I had lots of fun doing this. Hope you stop by soon to see what else I have been creating! Take care and Happy Crafting, Sue xx