"Hello there".
I have some exciting but also nerve racking news to share with you.
I'm going to be on Hochanda this bank holiday Monday at 8am! I still can't believe it. Wow!
So how has all this come about I hear you say? Well as you know I am on a couple of TV Design Teams and Lou Withers (whom I do samples for) was approached by Hochanda to see if anyone she knew would like to do some work for a company who wanted to go on Hochanda.
And so the rest is history as the saying goes and here I am learning something new, being a new guest and bringing a new company to Hochanda!
Little bit of history for you.
Tombow, if you didn't already know is a Japanese manufacturer of office supplies.
The company was founded in 1913 and has grown into an international business, based in Tokyo and has two overseas production facilities in Thailand and Vietnam and they have brilliant Water based pens and so much more for us crafters to create with.
And so as I have often admired other peoples handwriting, especially brush lettering I now have the perfect opportunity to learn a new skill using the Dual Brush Pens and like anything new, it doesn't happen overnight, it takes practise, and slowly and surely I'm getting there but in the meantime I'm going to show you what else you can do with these fabulous pens, as they are so NOT just for handwriting.

I can't wait to show you what else I have discovered using these beautiful vibrant water based pens and of course the other items on the show, especially the Tombow glue which has been my 'Go To' glue for many years.
The first project I would like to share with you today is a framed picture with a watercoloured background, stamped images and a hand written quote. I wanted to go with a more subtle colour tone for this project so I use the Dual Brush Pens as water colours.
Items used for this project
* Dual Brush Pens
*Aquarelle Watercolour paper
*Blending Kit (Set comes with 4 pieces for mixing the Dual pen colours and creating colour gradients. Contents: 1 x blender pen, blending mister, blending palette which is laminated and blending technique instructions).
*IndigoBlu 'Take Flight" & "Anemone and Daisy" Rubber Stamps
*Black StaZon Ink
*White Picture Frame

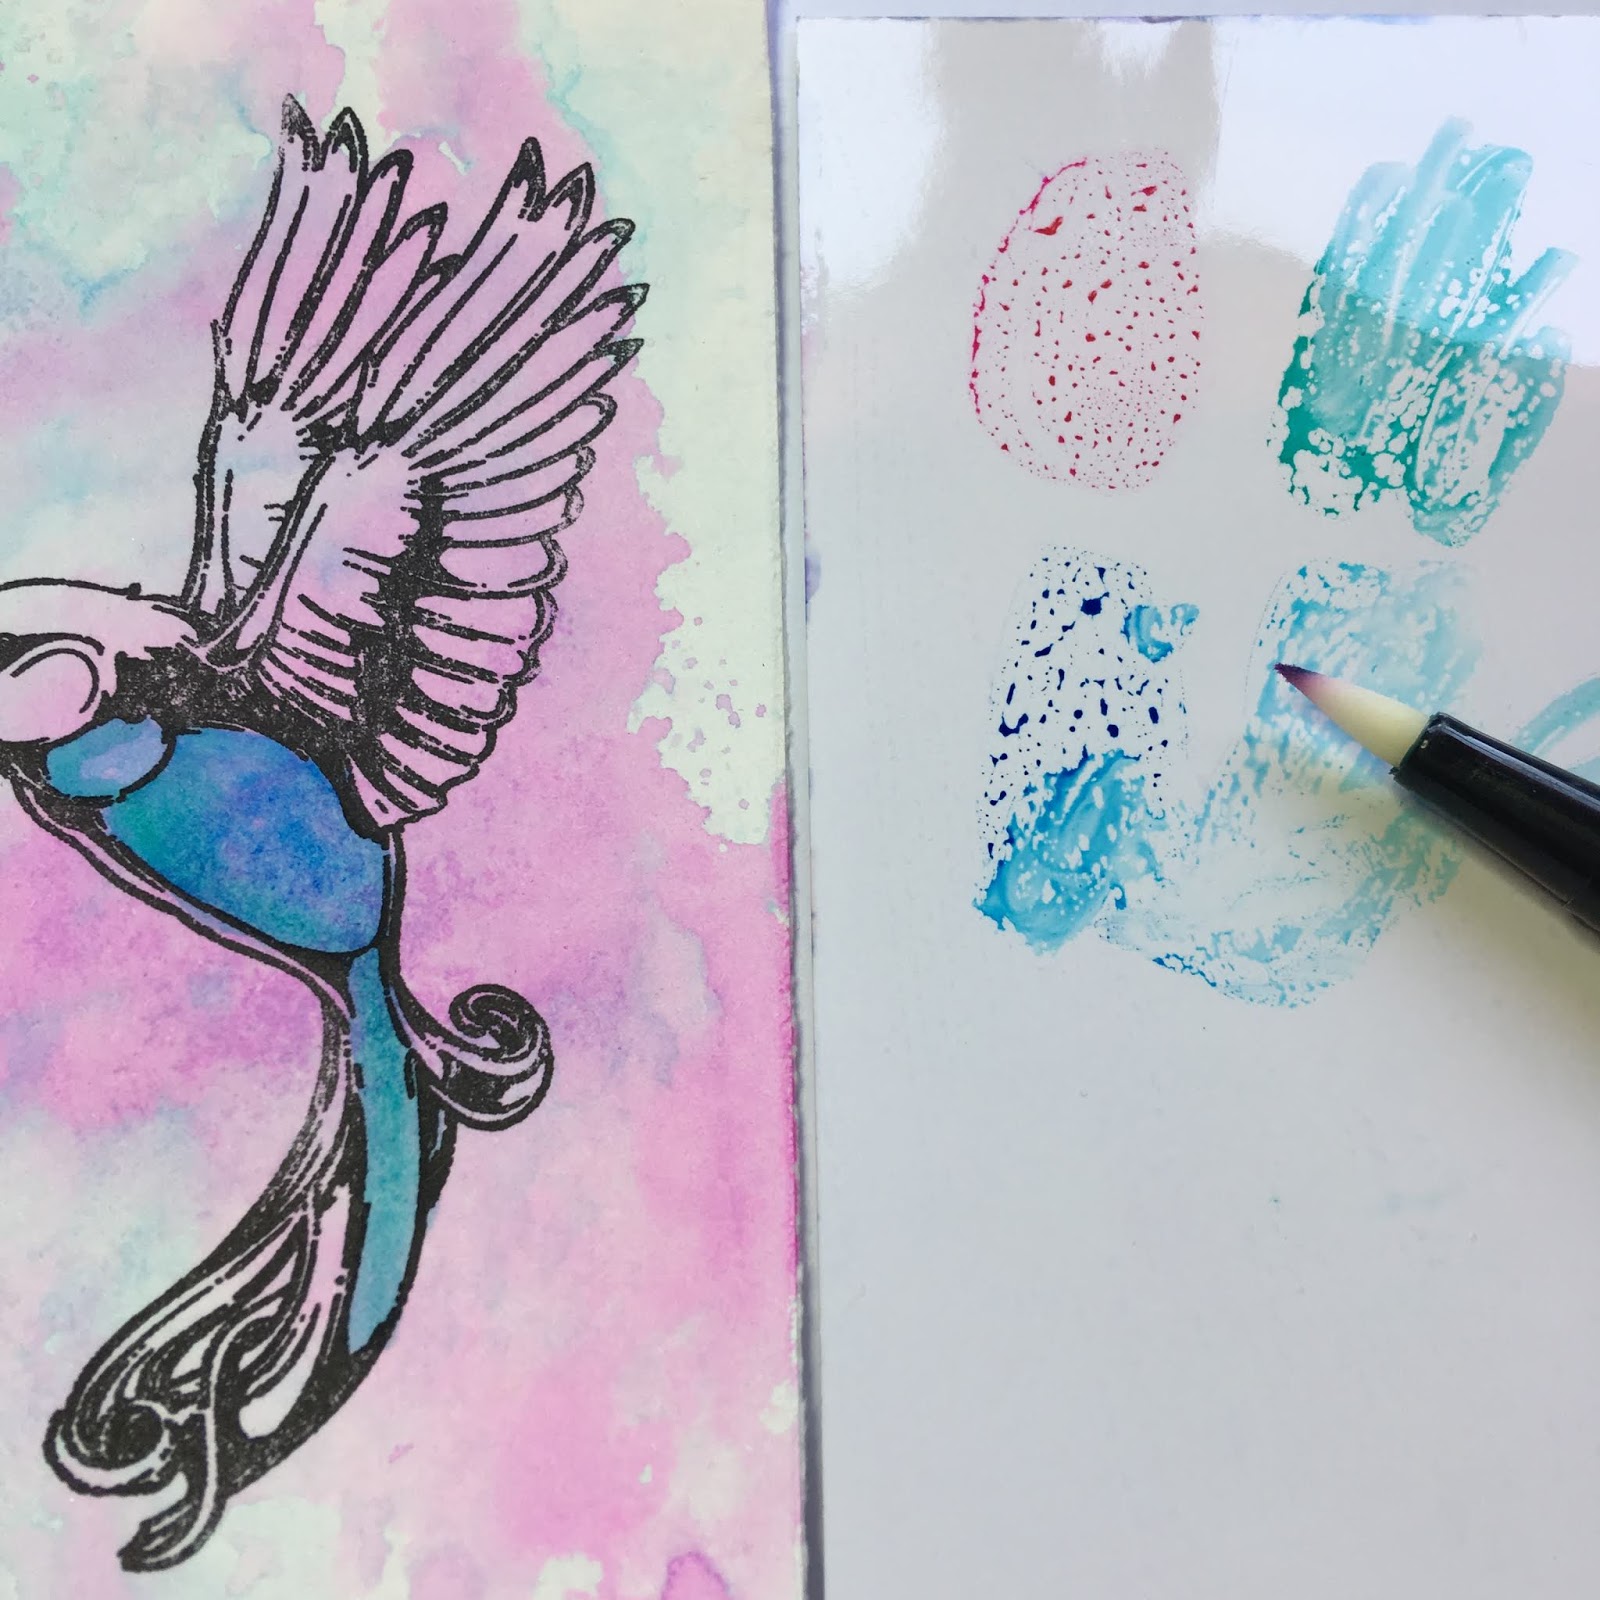
These pens have two tips - one fine tip, and one soft brush-shaped tip and its the brush tips I'm using to lay down some colour. They are water-based, soluble ink which means that different coloured pens can be blended together with water to create amazing backgrounds.

For this project I started with a piece of Aquarelle Watercolour paper which I wet down on both sides (this stops it from curling) then used Cyan (476) pen to lay down some colour on the Blending Palette which comes in the Blending kit.
After adding some water to it I used a paint brush to add colour all over the paper.

I then added Rhodamine Red (725) to the palette, this time spraying the colour lightly with water and laying down the blending palette on top of the paper to add the colour.

I used my heat gun to dry off the paper then added more of the Rhodamine Red (725) as the first coat had mixed with the Cyan a little to much but that didn't matter as it had produced a beautiful purple.

The Bird was then stamped out using StaZon ink as this is a fast drying solvent ink which wont move when adding more water colours. (As I had used water colour paper I used my stamping platform to make sure I got a good crisp image).

Now to colour the bird in.
I wanted to keep to more muted tones so I didn't colour directly onto the image with the pens, I scribbled colours onto the blending palette and used the blending pen (This pen is a colourless blender pen. You use it by picking up colour from the Dual Brush Pens and add the blended colours to your image. The pen is self cleaning. When you have finished adding colour just draw on a clean piece of paper to remove excess colour. You may find some colours stain the tip but doesn't effect the pen).
Using the blender pen produces some beautiful colouring so you don't get those harsh lines.
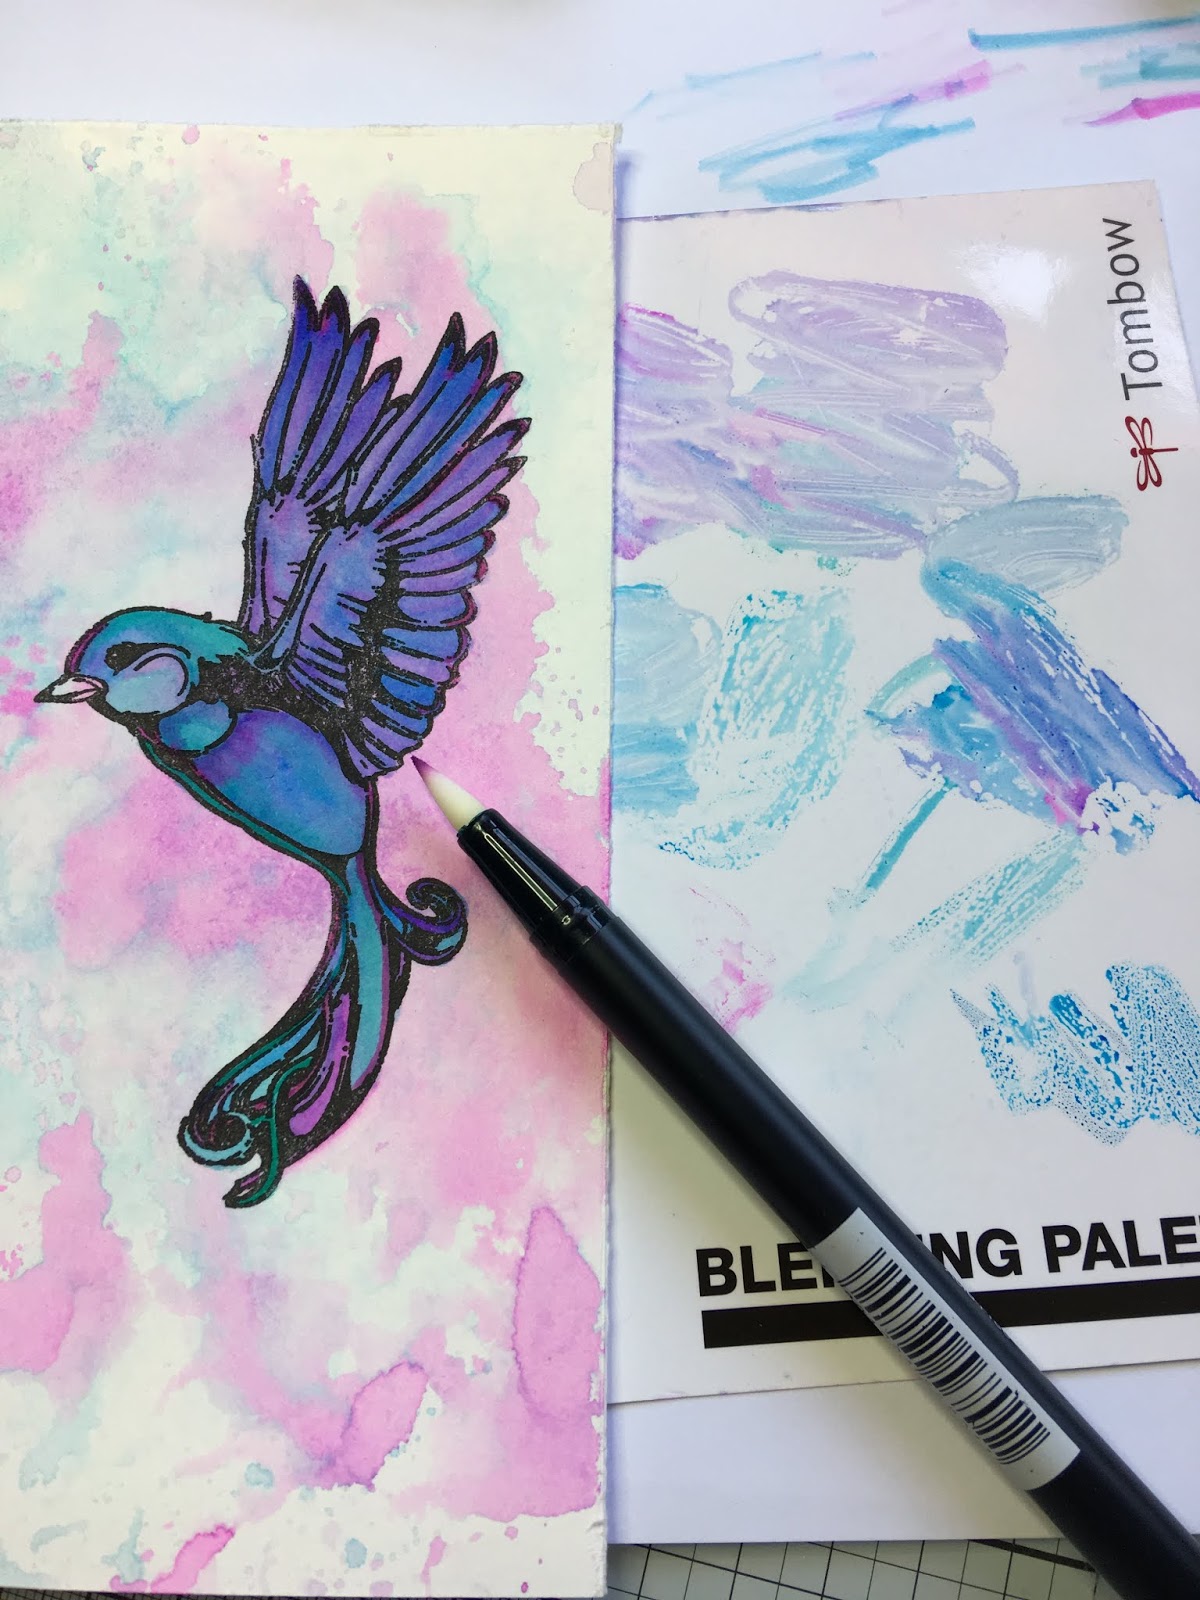
To finish off the bird I created a shadow around it using a Cool Gray 3 (N75) Dual Brush pen.

To write the quote out I used pieces that come in the beginners Lettering Set, first of all writing the lettering out in pencil, then drawing over it with the Black permanent pen. When dry I used the eraser to rub out the pencil lines.

After I wrote the quote I felt I needed to add something else to the bottom half of the page so stamped out the Anemone and coloured that in with the blender pen as well.

All that's needed now is to pop the picture in the fame and I have a completed piece.

Thanks so much for stopping by and watch out for more from me on my Tombow Creative Journey.
Happy Crafting,
Sue xx
absolutely brill project, so clear. hope ur not annoyed with me lol
ReplyDeleteFab - I shall be watching tomorrow, good luck 😊
ReplyDeleteWonderful and lovely vibrant colours xx
ReplyDeleteBeautiful, Sue and so elucidating!
ReplyDelete