Saturday, 10 September 2016

New Stencil Fun from IndigoBlu

Hi Guys,
As some of you know i'm on the Design Team for IndigoBlu and I have been having such fun with the New Stencils making up some samples for their latest show on Hochanda with Lovely Jenny Marples.
I posted a few photos on Facebook and have received a few messages asking what techniques I used.
 So here are photos of the samples and a quick description on how I made them.
I have also included a video I filmed a little while ago called 'Painting with Embossing Powders'!

Just so you know the stencils were sold in sets of three on Hochanda. 
Here are the names of the sets and what each stencil is called.
 CITYLIFE
 Family, Cityscape, Whimsical houses,
 BELIEVE
Believe, Wild Butterflies & Faith
STEAMPUNK
Cogs and Gears, Damaged Dots & Damaged Damask
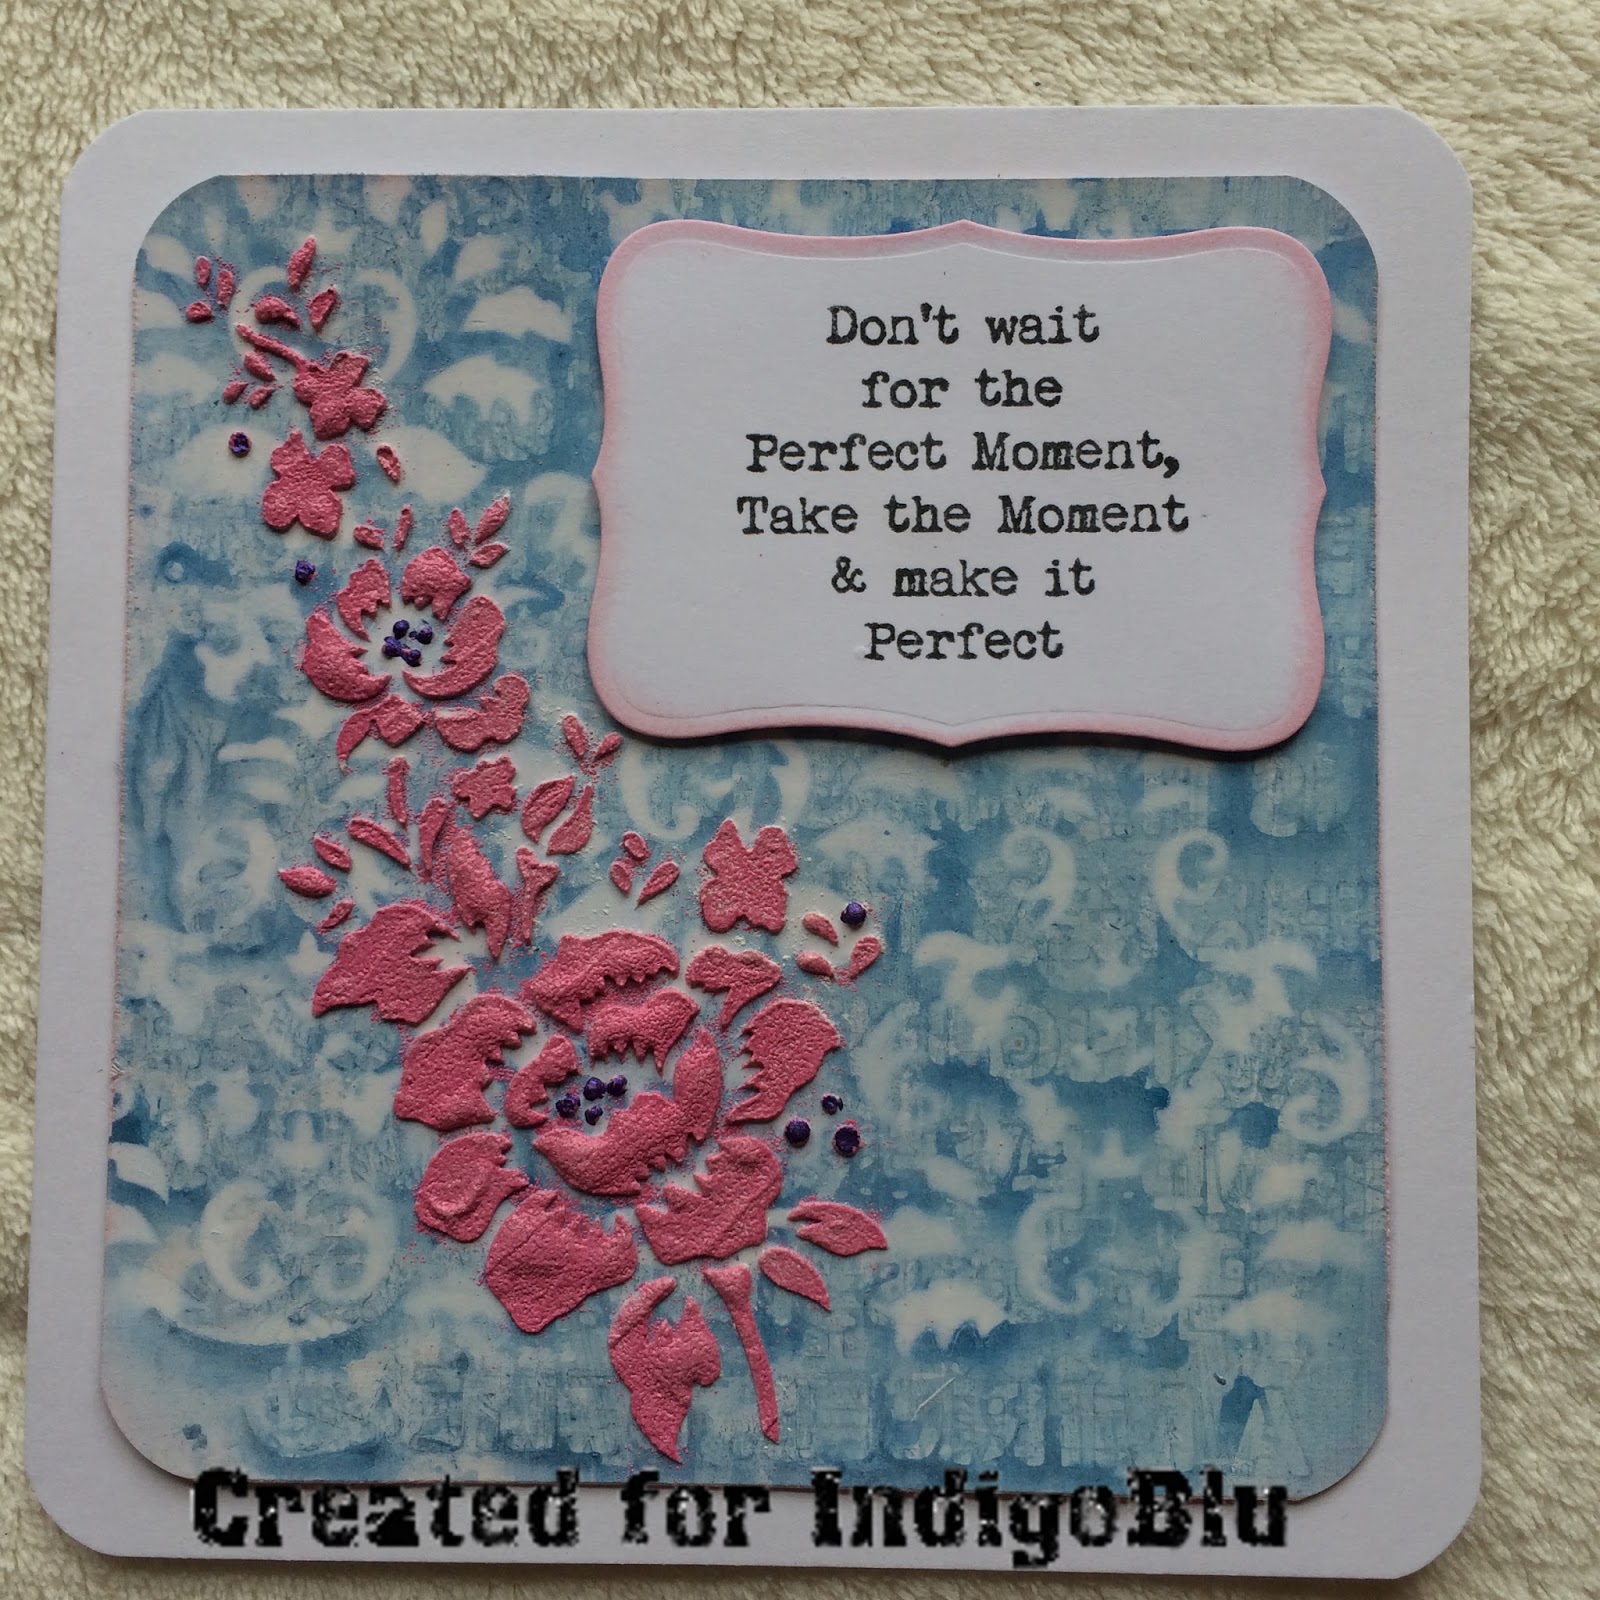
 This card was created using the Wild Butterfly Stencil as the main Focus and the background was  made using the paint I had used on two other stencils for different pieces. I just sprayed water on the stencils and put a piece of white card over the top and got a reverse image. 
The flower image was done with Matte Embossing paste then I sprinkled pink embossing powder over the wet image then gave it a blast with a heat gun. Just take care doing this as the embossing paste could bubble up and ruin your card!

For this card I used one of the papers from the New Range 'SteampunkesqueMixed Media Paper Pad and placed the New 'Cogs & Gears' Stencil over the top of it and ran it through my Big Shot with a piece of foam over the top to get a better image from the stencil. I then sanded over the paper to bring up the embossed cogs. I then placed the New Stencil 'Damaged Dots' over the top and sponged through

Indigoblu Artist's Acrylic Paint Miss Moneypenny, edged the dots with a white gel pen.

  
For this card I ran the Cog & Gears through my Big Shot, same process as above but used silver foil backed with card. I then sponged over three colours of distress inks and once dry sprayed it with gold sparkle. The sentiment is a die cut attached to a strip of vellum. 

For this card I used the old method of brass rubbing! Did you ever do this when at school on a trip to a Cathedral, Church etc?
I placed a thin piece of card over the Cityscape Stencil and rubbed over the top with Wax Crayons. (I found the chunky wax crayons better for this than the thin ones for this).This was backed onto a piece of black card to make it stand out more.

I had these little cotton bags in my stash and used the English Cottage Paints as they are great for stenciling onto material. I used two of the New Stencils, 'Wild Butterflies' and 'Faith'. (Before I started I placed a piece of cardboard inside the bag just to make sure the paints didn't bleed through). Apply the paints through the stencil using only a small amount of paint which you should work a little so you are applying almost next to nothing on your brush!
Once on layer was done and dry I then went over with the butterfly images. I mixed the paint with extra thick slap it on to give it a slight glossy finish. Once dry I added some beads to the butterflies bodies.

This was a simple card used from some leftover Extra Thick Slap-It-On mixed with paint that I had saved from a previous project. (Instead of just wiping it up and throwing it away I spread it onto a piece of card and left it to dry).
I stenciled on the Butterfly using ETSIO & Cinderella paint then once this was dry I went over it with the 'Damaged Dots' stencil and Snow White paint.

I had purchased a set of four coaster (£1) and gave them a make over. 
Luscious powders were mixed with water in spray bottles I used these colours to make a background with a A4 sheet of thin card which was cut to size. I then stamped and painted flower images from IndigoBlu and used the Stencils 'Believe' & Family to stencil on various words in Black Gesso, then Raven Black Metallic Paint.

Now this card was done using the stencil 'Damaged Damask'. I used my Versamak pad, pressing it down over the stencil onto white card.I then sprinkled over the image with several different colours of embossing powders. (If you would like to see how I did this I will add a link to a video tutorial I made a while back). Once heat set the card was cut into two panels to make this card. The inside of the card has a sentiment and part of the stencil design which I did using inks.

This card seemed to be a favorite! I first of all used the whole of the 'Whimsical Houses' Stencil as a background with Goldfinger paint. I then used the metal from a drinks can (Which I ran through my bigshot a few times to try and flatten it a bit)! and using the stencil and a embossing tool marked out three of the houses. I painted over the metal houses first in black gesso then Pheasant Bronze metallic paint. Once dry I sanded over the houses to bring back the lines and numbers.

This box was decorated with the 'Cityscape' stencil using embossing paste just through the dots. Once this was all dry I used distress inks to colour the box then went back in using the stencil to line the dots up once again and coloured them in with a contrasting colour ink.

The inside panels had words embossed on them using the stencils 'Believe and Family' Once the words were dry the panels were coloured in with distress inks and images were stamped on.

I hope you can see from all the above samples I have created that stencils can be used in so many different ways, I have only just scratched the surface. More ideas to come.
Happy Crafting xx


Tuesday, 6 September 2016

IndigoBlu Blog Challenge Reminder - All Things Bright & Beautiful


Hello there, how are you today?
So we are now moving into Autumn and I have to say this is my most favorite time of the year. I love the colours nature brings us.
Today I have a Tag Card to share with you as a reminder for this months IndigoBlu Blog Challenge, All Things Bright and Beautiful.

For this reminder I have gone under the sea where there is a whole new world of colour and beauty.

To start off, I used a Tim Holtz Tag Die to cut out the tag then stamped out several fish from the stamp set 'Under the Sea', reverse stamping one of the fish images. I then went over the tag with a couple of shades of Distress inks.
The Sea Horses and the Sea Grasses were stamped using using a few different shades of Stazon inks
I then started painting in the fish using the English Cottage Paints as well as a few of the Metallic Paints
Three different colours of Seam Binding Ribbons were added to a small Bull Clip. To get the scrunched look to the ribbons I separated the fibers at the ends of the ribbon and pulled a couple of strands and pushed the ribbon up.
A sentiment from the stamp set was inked up in Black Stazon onto a piece of Acetate and placed onto the tag. Glitter glue was then added around the edge of the tag to finish it off.
And here is the finished tag
I hope this has inspired you to get your IndigoBlu stamps out and have a go yourself.

Talking about "Inspiring", please check out the IndigoBlu Blog and Facebook page for so many other projects.
Take care,
Sue xx


Sunday, 21 August 2016

IndigoBlu August Blog Challenge - All things Bright & Beautiful

Hello there, how are you today?

I have an inspiration piece to share with you in the shape of an Easel Card. Of course I had to use the New Luscious Powders, along with a New Stamp called "Owl always love you"!


Each month IndigoBlu run a blog challenge with a different theme and the Design Team put together different projects to help Inspire you to get the most out of the stamps you may have purchase from them along with the other products they sell.

As an incentive for you to join in with the fun of the challenge they offer stamp sets as a prize for the winner, plus you are asked to be a Guest Designer.
The DT also pick 3 Top projects and these people are asked to to be a Guest Designer for the next challenge. That’s right, your work will be on the Challenge Blog alongside the Design Team!
When you win you get to choose which stamp you would like.
1: 2 Large stamp plates (A5)
or
2: 4 Small stamp plates (A6)
or
3: 1 Large and 2 small plates

There’s also the Winner’s Badge, and one for the Top 3, to display proudly on your blog. 


To enter, all you have to do is to follow the theme for the month and to use IndigoBlu stamps! Why not have a go. If you have any questions, or not sure how to enter ask away!

So back to the card above. As I mentioned earlier in the post I made a Easel card for a change as I do like to make different card folds.
. I'm not going to go too much into the making of this card but will put up a video tutorial I filmed a while ago at the end of this post.

Using white card and my die cutting machine I cut out two plain ovals along with two scalloped ovals that will be painted.
 Once I had stamped the Owl image on a plain oval and painted it with the Luscious Powders I left this to dry and made up a spray bottle containing water and Silver Luscious to spray over the image. 
The scalloped oval was painted with Lemon Meringue English Cottage Acrylic Paint and whilst wet I added some watered down Blue Luscious in strips and added splats of pink watered down Luscious. 
Before this piece was added to the Easel card I attached some double sided tape to the back and stuck down three contrasting colours of metallic thread. I added more double sided tape to the back and stuck it onto the card front.
 I then stamped out just the flower section of the stamp a few times onto a piece of spare white card, painted these flowers in the same colours as the main image, cut out and layered the large group of flowers and attached these to the base to act as a stopper. 
 Faux stitches were added to the top and bottom of the card panels and to the sentiment which I cut apart into blocks.
 Well that all for today, don't forget to check out the video below.
Happy Crafting xx

Easel Card Tutorial


Monday, 15 August 2016

Luscious Pigment Powders By IndigoBlu

Hello all,
Today I would like to introduce ways to use "Luscious" powders by IndigoBlu and if you haven't heard of them yet I urge you to watch my video as they have so many possibilities.

They are filled with rich pigments and mica which makes them so special. They also have an inbuilt binder which is activated when water is added to them or when you use them with slap-it-on, embossing paste, inks. 
TIP: The one thing I have found is that if you "Dust" the powders over your project you will need to activate the binder by spraying it lightly with water.


You could also try spraying your card first with water, sprinkle Luscious Powders over and watch the colours spread out.

I was sent six pots of this magic powder to "play" with and they are so much fun with so many uses. 
You can do so many crafty things with them and so far I have only just scratched the surface. 
The shimmer you get from these powders really make anything you make with them pop and shine.
The powders can also be added to the English Cottage Paints & Gee-Soo-Good. You won't get the shine come through but you can make some different lush colours.
I felt it was easier to make a video to show you some of the different techniques I have used so far with the Luscious powders.


Here are some examples of how I used them on different projects that I made for Kay Halliwell-Sutton's Hochanda show when the Luscious Powders were introduces a few weeks ago.


 Luscious Powders use to bring colour to this re-cycled jar. I also used the powders to paint the shrink charms I made.
 Several techniques used on this canvas. Background was stamped with VersaMark then Luscious powders dusted over the top. Luscious added to Super Thick slap it on and put through a stencil. The New "Owl always love you" stamp image was water-colored with the powders.
The "Owl" was stamped out and embossed then painted with the Luscious powders.


This tag card has been embossed with paste. Different colour powders were added before the paste was used with a stencil. More painting on the Poppy Heart.


This piece was first started by the Luscious powder being mixed with Kroma Crackle and spread around the outside of the canvas. Colours were added to ST slap-it-on and spread through a stencil. The Poppy Heart was stamped several times onto Modeling Film, painted, then the film was softened by a heat gun so that I could mold them into a flower for the center of the canvas.

Several techniques were again used on this card, can you see which ones?
Just look at the luster coming from the colours!
Come back soon, until then,
Happy Crafting xx