Sunday, 20 September 2015

A little pot of 'Wow' - Brusho Crystal Paints

Hello to you and thanks for stopping by.
A few weeks ago I purchased some little pots of Brusho's and I have been having so much fun with them.


So just to remind you, this is what they look like. 


For anyone who hasn't heard of these yet they are a unique, transparent, highly pigmented water-colour ink crystal powder. They react with water so they can be used in so many different ways. They are permanent so a word of warning, don't get any on your clothes and be prepared for inky fingers!

I wanted to know at a glance what each colour looked like so I punched out a small scallop circle, used double sided tape to attach one scallop to each little tub, then took a pokey tool to make 2/3 holes in each tub. (Please don't be tempted to take the tops off the tubs as the powder is so fine, one sneeze and it will go everywhere)!
One or two taps on the upturned tub will result in some of the powder coming out. I mixed this with a little water to get the colour to paint the scallop top.

Using Brusho's is so easy to make quick backgrounds for cards. Just sprinkle powder onto card (I used different types to see what the effects would be on watercolor paper, Glossy card and Stampin Up Whisper White Thick card stock), spray with water and watch the magic happen!

                                     
Once the backgrounds are dry you can stamp on them, I used StaZon Ink, and add decorations. For the card above I used Die cuts, and the card below I stamped the poppies then painted them in with the red Brusho paint slightly watered down. Once this was dry I went over the poppy heads with crystal effects and added little yellow beads into the centers of some of the heads.


This was a mini Canvas frame I sprinkled Brusho's onto and sprayed with water. Once dry a flower was added along with some gems.


Another way is to add the Brusho's to embossing paste to create a new colour for your project using masks!


                As I said, you can do so much with these little pots, you just need to let your                                                                                         imagination flow!


                                                                          Happy Crafting xx


Tuesday, 8 September 2015

IndigoBlu Blog Challenge - Frame it!


Hello and Thank you for joining me today. Crafting has gone on a bit of a go slow for me in the last month or so, so im hoping to give it a kick start with entering this months IndigoBlu Blog Challenge. If you fancy having a go and would like the chance to win one of the wonderful IndigoBlu stamps check out this link!

So this month the Challenge was "Frame it"
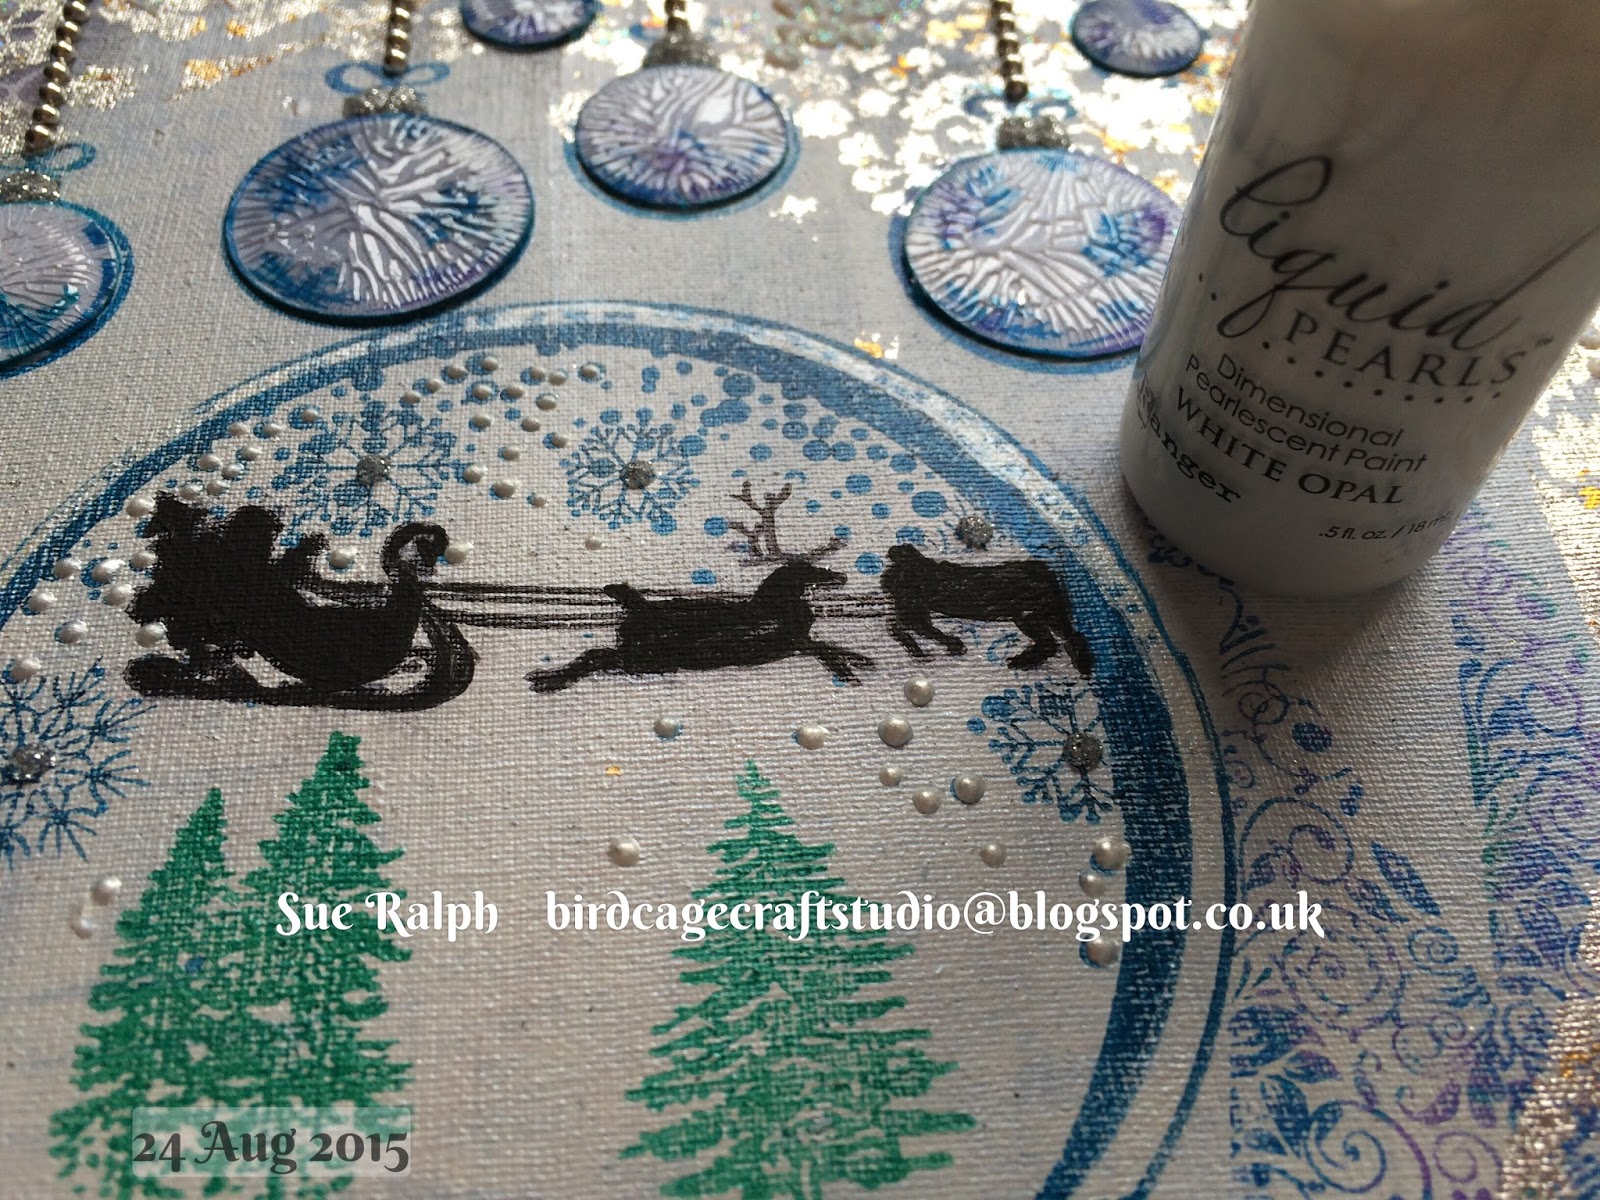
Well anyone who knows me, knows I like "Different", so when walking around a local shop I found some Embroidery Hoops, and they are a frame aren't they, so I scooped one up and that was going to be the style for this challenge. I rather think that it has ended up looking like a giant Christmas Bauble!


So to get this look this is what I did!


I stretched some material I had in my stash (by Stampin up) over the inner hoop, then put the outer hoop over the material and locked it in place with the outer hoop. I then turned the hoop over and cut away the extra bits of material.


I then painted over the material with white Gee-Soo Good paint to help make a good base for adding other paint and inks, then once dry went over this with some English Cottage paints in Grandma's Teacup and Snow White.


Once again I left the paint to dry then went on to stamp on my design using a few different IndigoBlu stamps including one of their New Stamp sets called Snow Globe. 
The other set used was Here comes Santa. I used StaZon Inks for this part! Because of the size and shape of the hoop I was having a few problems finding something to place under the material so I asked my husband to cut me a piece of wood to size and it has worked wonderfully. 
(Thanks Martin xx)


The next step was to add some colour and texture to this piece and I did this by using Mega Flakes and Embossing paste with glitter in it through a mask from!


 I then decided the hanging baubles looked to flat so I stamped them again, cut then out and applied Crackle Glaze to them, hoping to give them a more vintage look. Once dry I glued them into place.


Inside the Globe I added some falling snow with liquid pearls and cut out a larger Christmas tree to go over the top of the second reindeer (No photo of this yet), added some false snow and cut out a piece of acetate to go over the globe! Once the acetate was in place I then went around the edge of it with Diamond Ice Stickles.


I stamped out another base for the globe out of card, made a couple of paper clay embellishments, decorated these with paint and Mega Flakes.


 To finish off this creation I tied on some sheer white ribbon to make a large bow at the top of the hoop covering the tightening screw.


Thank you again for joining me today, I hope this has given you some inspiration to have a go yourself.
Happy Crafting, xx


Saturday, 15 August 2015

Precious Metals- My take on this months IndigoBlu Blog Challenge

Hello there, thanks so much for stopping by!

For the last couple of weeks I have been having several technical issues and I now believe we have come to an understanding!(fingers crossed)!
Firstly it was Word and Excel on my computer, then my iPhone went on the blink and lost all photos of the steps I took to complete this challenge. I wasn't happy!
Anyway, now on to the fun part.

This time round I thought I would create something fun and when I saw this little Owl I knew just what I would do! 

                             From This                                  To This
So my entry into this months IndigoBlu Challenge  is this funny/cute altered Owl! What do you think?
To start off with I painted the wooden owl with white Gess-Sso-good and whilst that was drying I pulled out several stamp sets.  I used the small feather from the 'Plume' set along with FlitterGlu and 
Mega Flakes in Gin & Tonic and Morris Dance onto Vellum, then cut out them out for the wing feathers. I used Pinflair glue to layer the feather to give them a little extra lift!
  
                                   
I then stamped onto tissue paper with Black StaZon ink using the Love is Dinky stamp and glued the image onto the stomach area with Slap It On, then went on to stamp the image twice onto white card with a Green StaZon Ink for the eyes.
 I went around the outside edge of the eyes with white opal liquid pearls and added a pair of false eyelashes! 
The pupils were coloured in with a black sharpie pen which unfortunately bled a little when I added crystal effects to make the eyes shine.


Onto the back of the owl. I stamped onto a circle of card with a sentiment from the stamp set Discover your Passion, then to add some more texture, especially on its back and feet I used some stencils and paste and once dry I painted it over Goldfinger & Copper metallic paint to give the Owl that precious metal look.  
I has some white flowers in my stash, so they were also given the paint treatment and glued around the bottom part of the owl. 
I went onto paint some Alter Ego's with a few different colours of the English Cottage  & Metallic paints and added body details to these with tiny, tiny beads.

                                   
I wasn't that happy with the front of the Owl so decided to cover the heart with Mega Flakes for more of a precious metal look and added a metal embellishment from my stash, after I gave it a bit of a makeover with the metallic paints and liquid pearls!
My daughter came home at this stage and she thought the Owl was 'sooooo cute'! 

What do you think?

Thanks for stopping by today, hope to see you here again soon.
Happy Crafting, Sue xx 


Saturday, 1 August 2015

One for the Chaps- Waterfall Greeting Card.

Hello there,
Tonight I have a card to share with you, one that I think would suit most men as it is an interactive card and in my experience men love these sorts of cards!
To show the working of the card I have filmed a short video to show you!


I made up an Easel base for this card then attached the Waterfall workings sideways to make this card a little different!


The waterfall itself was made of circles with a silver boarder that I hoped looked like portholes.
For the cards pull tab, I tied knots into some thick Bakers Twine to keep to the Nautical theme!


Side View of the Easel Style Card. I drew faux stitching around the boarders of the card as well as the circles for the stay!


The stay for the card was made from crafters clay. The shell and Anchor were painted with an acrylic paint then mounted onto card circles and a pearl was added to complete the look.
I hope this gives you some inspiration for a male themed card as I know we crafters sometimes find it difficult to make male cards.
Happy Crafting xx