Hello there, thanks for checking in today!
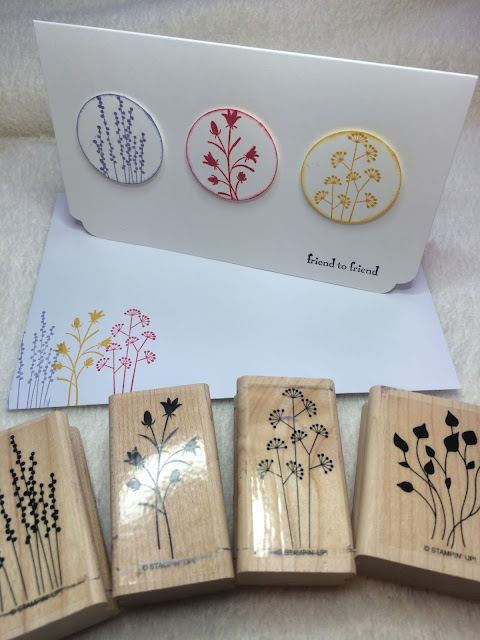
I'm back to share a couple of cards with you that I made using two older Stampin Up sets I dug up from the depths of my ever growing pile of stamp sets.
I had a one-to-one workshop with a new crafter and I wanted to show her what can be done with just a few crafting supplies.
Here are a few items I suggested she should get.
1. White Card Stock (for now)!
2. Stamp set
2. Black Ink Pad, (Possibly 2 or 3 other colours) or Pens to colour in the images
3. Sharp pair of Scissors
4. She already had a trimmer (but if you don't a cutting mat and craft knife)
5.Double sided tape and glue, double sided foam dots
6. Bone Folder
7. Pokey Tool
8. Scoring Tool
9. Ruler, Pencil & Rubber
10. Sponge pieces or Daubers
I also suggested she look for a craft magazine for some ideas and one that had a free stamp set with it to start her off.
I also suggested she look for a craft magazine for some ideas and one that had a free stamp set with it to start her off.
So the supplies we used were
*Stamps (Unfortunately both sets are now retired)!
*White Card Stock-250gsm, cut to size
*Extra card stock for stamping & Punching out circles (You can cut out the shapes if you don't have a punch)
*Envelopes
*Coloured Ink Pads (or water based marker pens)
*Paper Doily cut up
*Bakers Twin
* Wink of Stella brush pen in Clear (Has a great sparkle)
For this card we stamped out 3 of the images from the stamp set onto white card, punched them out then went around the outside of the shape with a dauber & ink.
The Wink of Stella pen was used to highlight the images
(apologies the camera didn't pick up the sparkle)?
Then we stamped a sentiment onto the card front before adding the shapes. We did this by using double sided Foam Dots
We also decorated a piece of paper as a liner for the inside of the card and also decorated the envelope.
TIP. Place your middle shape down first in the middle of the card. (The ruler was great for doing this)!
Much the same was done for this card. The images were stamped in the center of the card, highlighted with the Wink of Stella pen and a piece of doily was cut out and stuck over the very bottom of the images.
A length of bakers twine was added around the center of the card and a Bow was tied at the edge of the card.
A decorated liner was added to the card and the envelope was stamped on.
TIP. Draw a faint line across the card to help you line up the stamps.
Ok, for this card, stamp your largest image first, then fill in the rest of the card front with smaller images.
Stamp out a sentiment on an extra piece of white card, cut out and mount it on foam dots. Attach this to the middle of the card.
A card liner was added and also the envelope was decorated.
TIP Go around the edges of the sentiment with a coloured pen or ink to make it 'Pop' out
Thanks for stopping by, I hope this has given you some inspiration.
Happy Crafting xx


These are gorgeous cards Sue. I love the fresh and bright colours - very cheerful. I have the first stamp set you used - I really must dig it out! x x
ReplyDeleteThanks Michelle, I felt it was time bring out some different colours.
DeleteIt is such a lovely set, I thought it was time to blow off the dust!xx
Love how you can make something so amazing with just a few supplies! x
ReplyDeleteThank you Sue. Sometime less 'Stuff' helps you to come up with different ideas. xx
Delete