Saturday, 13 August 2016

Christmas in August

Hello everyone,
Christmas in August seems quite strange when its warm and sunny outside but when you are designing different projects to showcase New Release Stamps and products for IndigoBlu its just something you have to do. Mind you, I have had a real buzz doing this as some of my designs have been on Hochanda, fancy that, being on TV! Well not me, but my works of art! And another good thing is that I have made a start on my own Christmas Cards.
Wednesday brought Let Leonie Loose on Hochanda (this link is only good for a week as the show is on catch-up) and she was showcasing some of the New Products & Stamps from IndigoBlu and some of my samples along with others from the DT were shown so I thought I would share some photo's with you today.
If you haven't seen any of the New stamps and products yet, you really must take a look as they are FAB, especially the Luscious powders
I have loved using the Luscious powder so much as its so versatile that I have put a Video together showing you some techniques. (Hoping to add it it YouTube later today after doing a bit of editing)!

I'm hoping that after you have seen these projects they will inspire you to start your Christmas Crafting. 
Have fun, 
Sue xx
This canvas was made to look like a wrapped present. This Stamp set is beautiful and is called Winterland Wood.
 I also created a matching tag
I stamped a sentiment onto the ribbon
 This card was made using the Country House Stamp. I cut the doors and masked certain part of the stamp details off so that I could make a secret garden.
I opened up the door and stamped the Deer Images in the "secret Garden"

 For this shaker card I used the Mother & Child Stamp
The images was embossed in Gold embossing powder


 The next two cards were made using images from the stamp set "Peace on Earth"
 This card was made from acetate and the Angel image was stamped and coloured onto card and cut out and attached to a silver card die cut. 
 This was a fun card to make using the Christmas puddings. The images were stamped straight onto the card and an extra one stamped on another piece of white card, coloured, cut out and mounted on foam pads. Do you like the little coin popping out of the pudding?
I found some small wooded spoons so give this one the Mega Flake treatment.


And last but not least, I put together a Christmas house using all the New Christmas stamps I have ATM! 


 The house was first given a coat of White Gee-Soo-Good then once dry painted with Goldfinger paint. Once dry I used the New Super Thick,  Slap it on through a couple of stencils on the roof and outside walls.

Unicorn Sparkles was added aound and inside the house.


Tuesday, 9 August 2016

Having fun with Slider Cards

Hello everyone,
I decided to create a few more sliding cards, not for any reason, just that I enjoy making them. 
(Have you tried making one yet, I find that men folk find them fascinating).

I'm not going to do a long tutorial on how to make either of these cards as you use the same technique I used on the Sliding Camera Card I shared on my blog a little while ago. I have now added that video to the end of this post!

Here is a quick video to show how these new cards work.


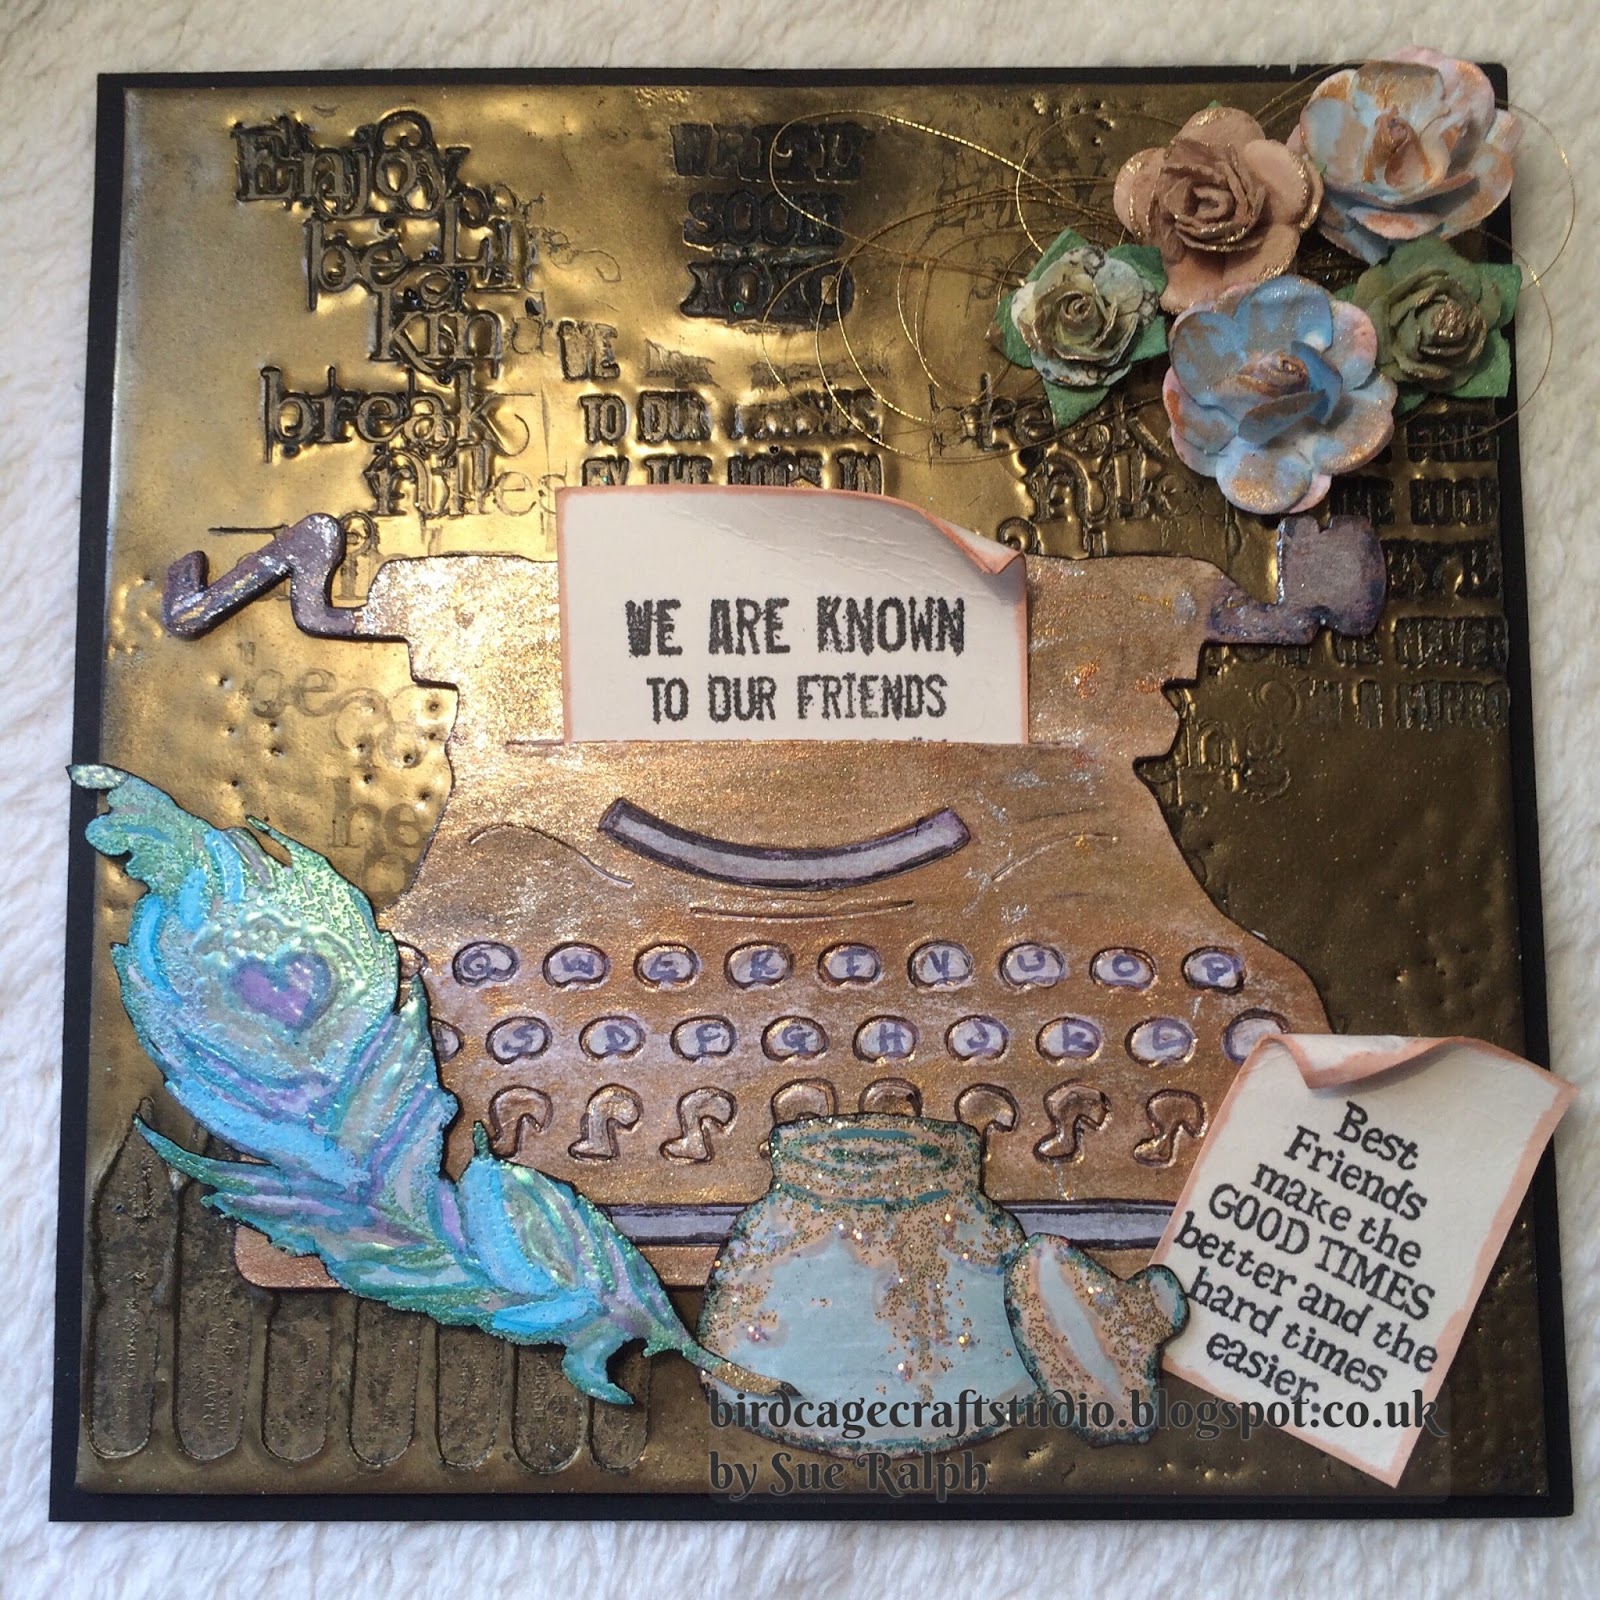
To start this card off I used the Tim Holtz Typewriter Die. I cut out a couple in different colours. The main typewriter was painted then I added the different colour card pieces into place and painted those to give a vintage look.
I then stamped out the sentiments, inked around the edges and rolled the top corner to each piece.
I cut out a piece of thick card for the backing of the typewriter and applied heated up several layers of gold embossing power on it, and whilst it was still hot pressed into it with several stamps to leave an embedded image.
I then went on to stamp and colour the ink-pot and quill.Glitter was then added along with gold thread and painted flowers.

                            "Enjoy Life"                                                           "Take the Time"


                                   "Plume"                                                               "Good Times"


Now for this card I used the Tim Holtz Telephone Die. 
I cut out three of the telephones using white card.
Each of the hand pieces were cut away from the main part of the telephone. Two of them were glued together to give them some extra strength, the third one was glued in place once I had attached the acetate message and cord.
I used the Raven Black Indigoblu Artist's Acrylic Paint to paint two of the telephone die cuts, the third one was kept white to fill in those little details. Some parts were painted silver.
The background was first of all inked with a brick stencil, then I used embossing paste with the clock face stencil. Once dry I stamped a boarder with one of the sound waves from the stamp set "Light & Sound Borders". A Police box image was used from the paper pack. 
The edges of the paper were distressed and inked in blue. I crumpled the paper to give it an aged look and painted over it with a watered down blue paint.
Because I wanted to create a sliding element to represent a voice coming from the telephone I stamped "Hello" onto a piece of acetate along with a small part from the sound boarder.
The card was finished off with three die cut no"9"s.


       "Lost Family - Mixed Media Paper Pad"                "Clock Face - Stencil"

                            "Word Block #1"                                        "Light and Sound Boards"

Well thats all for tonight. I hope you have enjoyed this post. Hope you come back soon.
Happy Crafting, Sue xx


Sunday, 7 August 2016

One Stamp Set, Five Cards- Making the most of your stamp set!

Hello to you,
I hope you are enjoying your Sunday! Its warm and windy here in the Leigh today. 

A couple of days ago I decided I needed to set myself a couple of challenges, so this is going to be the first of a few I have come up with.
 Make a set of five cards from just one of the stamp sets I received from IndigoBlu. 
I thought it was a good way to make a start on my Christmas cards and what a a fun way it was to do it.
To start all of this off I have used the stamp set "Peace on Earth".


This stamp set has so many different images to use, I was spoilt with choice as to what to use first!

   1st Card
 I knew I wanted to use the Christmas pudding but wasn't quite sure how, so I stamped out a couple of images and laid them out in several way until I came up with an idea of a shaker card.

To make this card I used a foam circle slightly larger than the pudding image for the shaker part, using a pencil I drew around the outside of it then had a template to follow to stamp the other puddings around. Once I had done this I stamped the text image inside the circle, stuck down the foam circle, added some glitter and crystals and covered with a acetate circle. I then went around the outer part of the circle with glitter and attached a cut out image of the pudding!

2nd Card
For this card I knew I wanted to use some small frames I had made out of paper clay
so then it was just which images should I use.
I painted the frames with some of the New indigoBlu 

 Luscious Pigment Powders in Gold then sprinkled on some of the IndigoBlu Unicorn Sparkle.

As you can see from the photo I added several layers of white and black card and had black ribbon coming from each frame ending on a different layer.

3rd Card
 So for this card I used the beautiful Angel and the strip of stars
Because the size of the Angel was more fitting to a rectangle than a square shape, I cut out a panel to sit the image on. I used my dust-brushes to add two different colours of blue ink to this panel and edged it with gold. 
I then stamped the Angel image into the middle of the panel plus an extra one onto white card. I coloured and cut out this image and used foam dots to lay it over the stamped image on the card. The stars were stamped out to make a boarder around the angel. 
The panel was then mounted onto a piece of white card that had been through my die cutting machine to give it some texture. This was then mounted onto a card blank.

4th Card
 As soon as I saw the wreath stamp I knew I wanted to join a few together to make up a larger wreath and this is what I ended up with.
I stamped and cut out several images of the wreath, added gold luscious to the stars, red gems as berries and white enamel dots and of course some unicorn sparkle. 
The wreaths were set out and once glued down I wound some thin red ribbon between then.
I felt that a boarder of some sort was needed so went around the edges with..................
have you guessed?? The top of the globe!
This was then layered onto gold card then onto the white card blank.

5th Card
 I sat and pondered on this card for a while. I wasn't too sure what to do with the globe then I thought, "peace on earth" looking down from the sky...Stars and an idea had formed!
I used a whole set of Die cutting nesting stars and once cut out, I painted them with Gold Luscious (I love these powders) and added unicorn sparkle to the tips.
The layers of the stars were put back in place and on the reverse side I attached them together with a thin piece of double sided tape from the top tip of the star down to the end of the star.
The background card was embossed with gold powder using the script stamp from the set along with a circle mask I cut from copy paper.
A couple of gems were added the the card front was attached to a white card base.


So how's about you setting yourself a challenge as well? 
I have enjoyed doing this and have made a start on my Christmas card list, how cool is that!

Hope you have enjoyed reading this post. I would love for you to pop back soon to see which stamp set I will use next and to catch up with the next challenge I have set myself .
Happy Crafting,
Sue xx


Thursday, 4 August 2016

IndigoBlu "Summer Floral" Blog Challenge reminder.

Hello and Welcome.

Have you seen the current IndigoBlu challenge yet? If not you still have plenty of time to enter. 
 I have created a card to share with you hoping that it will give you a bit of inspiration to enter a piece of your own work into the challenge.

I have brought out the Sunflower stamp again as this image always make me think of summer. This time I have made a Concertina Fold Card.

The card is fairly simple as its mostly stamping and spraying the images with paint. 
I have taken lots of photos to help with the Tutorial as being a visual learner myself I always find that it helps me!
Front of the card

Open up the inside of the card to find a concertina of Sunflowers

These are the items you will need if you fancy having a go at making one for yourself, but of course you can always change the colours.


Mix the English Cottage Paints with water in a 1.4 ratio in the spray bottles

Randomly spray the images (for this card you will need "6" sunflowers) a few colours at a time then heat dry. Add more colours to get the effect you want. (Don't over-wet the card stock)

Take the time to dry layers between spraying!


 I did a bit of fussy cutting around the sunflowers but you could just cut them out as a circle and the concertina effect would still work.

                             
 Now find the center point of "5 " of the sunflower and score down the middle

                           
 Run a line of glue close to the petals to attach each of the sunflowers together.
See photo below

 Once all of the petals are glued together, use a couple of clips to hold them until stuck.

                    
The "6th" sunflower is for the the front of the card. 
I stamped and cut out an extra leaf and middle part of the sunflower, added glitter and micro beads to this to give it a bit more dimension. 


The center of the flower and leaf were attached to the main sunflower with Pinflair glue gel.
I then highlighted the sunflower with some of the NEW Luscious powders that I mixed with water.
I cut out an 11" x 5" piece of white card stock and scored it down the middle, making my card blank.
 I also cut out 3 pieces of yellow card slightly smaller so that you would see a boarder of white card, and put them through an embossing folder.
Two of the yellow pieces were glued to the inside of the card.
I then lined up the folded sunflowers on the inside of the card close to the edge. 
See photo above
Putting a thin strip of really tacky double sided tape close to the edge of the petals, close the card in half so that it sticks to the card. Flip the card over and repeat on the other side.

 Attach the single Sunflower to the front of the card along with your chosen sentiment.
And "hay Presto", one finished card!

I hoped that you have enjoyed reading this blog post and I would love to hear what you think, and would like to invite you to subscribe to my blog!

Happy Crafting, will be back soon with another project, Sue xx