Thursday, 28 July 2016

Luscious Sneak Peaks for IndigoBlu

Hello Everyone,
So summer is officially here, children are off school, but what has happened to our weather here in the UK?

The last couple of days I have had my head down making up some samples for IndigoBlu who will be on Hochanda on Saturday with a one day special!

A parcel was delivered to me on Tuesday with some new goodies to play with and they are LUSH! A new Owl Stamp and a New product called Luscious.
So today, after a long night crafting and a dash to the post office, I can share a few things with you.
Once Kay Halliwell-Sutton has completed her shows on Saturday, 8pm & 10pm, I will pop back with some hints and tips about this new product.
Stay tuned as they say!

Here are a few samples, hopefully to inspire you to get crafting yourself!

Greeting Cards


New Owl Stamp - Owl always love you

  
Altered Canvas


Can't really see in this photo but its a 3D canvas


Altered Pot. What do you think came in this one?

Thats all for now, be back soon,
Happy Crafting, Sue xx

Thursday, 21 July 2016

IndigoBlu Inspiration Piece - Summer Florals

Hello to you and many thanks for popping by today.

IndigoBlu have a new challenge up and running so I am here today to Inspire you to have a go at entering one of your own creations. 
For each monthly challenge, we a super prize for the winner as well as asking them to create an Inspirational  piece for the next challenge. 
The DT also get to choose three other entries and those people are asked to create an inspiration piece ready for the next challenge. 

The Theme this month is SUMMER FLORAL's and as soon as I read the title I though about Flip Flops (summer sandals).
So an idea formed in my head about decorating a pair for my sisters granddaughter so off I went to do some shopping, ................but of course ended up buying a pair to decorate for myself as well.


So, come join me in making some summer floral embellishments to jazz up sandals.


Here is a list of the IndigoBlu products I used to make the embellishments for the sandals.


 The first thing is to wash and iron the piece of cotton material then to paint it all over with the White Gee-Soo-Good which primes the material ready for the artwork. 
Either leave this to dry overnight or dry it with a heat tool.


 Once the cotton material is dry, stamp on the images, (and use a stencil if you have one). 
I used the Black Gee-Soo-Good for the Sunflowers & English Cottage Artist Acrylic Paints Wimberry Pie for the Roses, Hunter Green for the leaves.
I then brought in Cinderella & Townhouse Teal for the Laurel leaf stencil.


I then painted all the flowers and leaves, mixing up a few of the colours to create different shades. 
Did you know these paints are also Fabric paints? 
(Once the paint is dry, sandwich the material between some copy paper and iron to set the paint)!


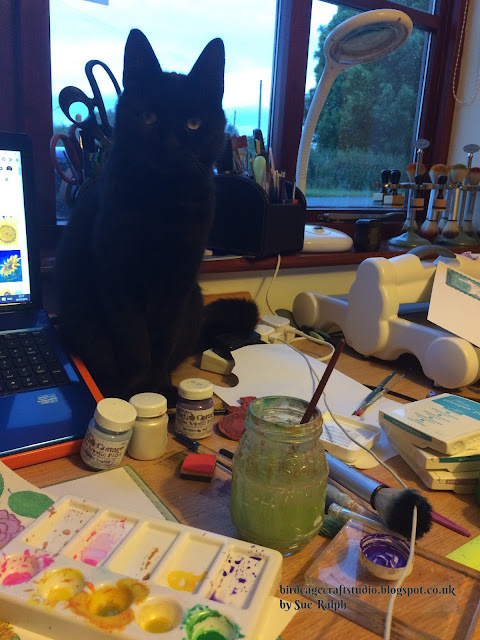
 By this time Cookie came into my craft studio looking to see why his tea wasn't being served!


One the painted images were completely dry I cut them all out and gave them a coat of Slap-It-on Glossy to seal the cut edges. 


When the 1st coat of  Slap-it-on was dry, I painted on another coat and molded the sunflower over small pots and left them to dry.
The pink roses had the same treatment with the Slap-it-on but I pinched the rose in the middle to crease them and put a peg on the back to hold the creases in.


I felt the sunflowers needed a bit more depth so I die cut some felt to stick between the sunflowers. 


  Small seed beads were added in circles to the center of the top sunflowers. The first circle was with a mixture of gold yellow & black beads. The middle circle was filled tiny gold beads and the centre circle was filled with the three coloured beads.
I haven't taken a photo, but the small roses were sprinkled with lilac glitter.


What do you think of my Sunflower & Peg shoes then? Do you think they will catch on, become best sellers Lol!


I used E6000 glue to attach the flowers to the shoes and used pegs to hold everything in place until the glue dried.


I'm hoping Ava likes her shoes. I will let you know if there is any interest!


I'm really happy with my shoes. Just waiting for the British sunshine to show itself again.


Once flower embellishments were stuck in place I gave them one last coat of glossy Slap-it-on.


I hope that this blog post has given you some inspiration to try something new.
Take care and Happy Stamping xx

Tuesday, 5 July 2016

Sliding Camera Card Tutorial

Hello there,
I'm back today to share a tutorial I have been meaning to film for a while now.

I made a Sliding Camera Card for my daughters friend a while back, took a short video of how it worked and popped it on YouTube and couldn't believe how many people had viewed it. So I have shared a tutorial on how I put it all together. 

Because this card was for the video I kept it fairly simple.
 So this card was a bit of a backwards card for me.
 The camera and sliding film strip was what I was concentrated on in the video,  I then decorated the card after I had finished filming.


Here is the link to my You Tube Video and further down this post is the list of items I used and a few more hints, tips and photos.
Apologies the film has come out slightly dark. Back to the drawing board lol!


This is the workings for the smooth sliding of the card. When placing your double sided foam strips down make sure you stick them around the edge of the die cut so the tabs are not blocked from sliding up to the front of the card opening.
.


When sizing your strip make sure you leave a little space by the tabs before sticking down the film strip that way when you pull out the strip you will see all your photo's


If you stick your film strip on the line of the tabs you wont be able to see the last photo properly!


I had also made a couple more cards using the camera die and used different techniques from Painting with the IndigoBlu Artist's Acrylic Paint, Embossing paste and stencil, and a few of the IndigoBlu Stamp set to decorate them.


I love to read your comments and hope you visit again soon. xx

Monday, 4 July 2016

IndigoBlu June Challenge Reminder - Brown & Teal

 Hello there and welcome. 
Today I have a reminder piece to inspire you to get your IndigoBlu stamps out and join our challenge this month using the colours Brown and Teal which gives you so many options no matter which stamp set you choose to use. 
And don't forget that if you win this challenge you get to choose which stamp set you would like, plus you get to be a guest DT member and design a Inspiration piece for the next challenge. 
If you are picked as a Top 3 winner you get to create an Inspiration piece for the next challenge as well. How cool is that!
This time round I decided to make something for the Men. Although I created this one in a small wooden frame it could so easily be made into a card instead.


This is what the back of the frame looks like. I used a piece paper from Belle Epoque

One of the crafting techniques I enjoy doing at the moment is to use embossing paste to give some texture but I know a few people that don't have any so I used a different technique on this piece using a tissue to get some texture.

First things first, if you are using a wooden frame give it a coat of Gee-Soo Good to prime the wood. Whilst that is drying move onto making the background for your project. I cut a square piece of thick white card and slapped on a good coat of Slap-it-on then separated a tissue and placed one layer on top of the slap-it-on


With a paintbrush start to gather up the tissue around the card covering the square. I added a bit more slap-it-on to stop the tissue sticking to the brush. Leave to dry out.


 Once the square panel was dry I painted it with Townhouse Teal. I also used the same colour to paint the inside edge of the frame

Once the Townhouse Teal was dry I went over the high spots of the texture with some Hot Coco paint and added a little Kingfisher Blue to add a slight shimmer.

 I pulled out some cogs & Gears and painted them up with the same coloured paints used for the backing piece. The frame was covered with Flitter Glu & Chocolate Box Mega Flakes.

Before attaching the gears I stamped a few images from Rugged Edge & Good times

I stamped out the Car image and Text  twice from the stamp set 'Little Voice', added two extra wheels to the car and chopped up the words and re-arranged them on the frame. I also added a lamp post from my stash

                  
Well that's the end of my post today.
 I hope it has inspired you to challenge yourself and join in.
Take Care and Happy Stamping xx