Hello to you. September is now well and truly here but the weather is doing some strange things here in the UK. As I am sat here writing this we are having a mini heatwave. Not sure how long it will last though. Its that time for the New Challenge over at IndigoBlu, why not check it out and enter one of your creations. Check it out here!
Well I really wasn't sure what I would create for you this time round, so I turned to Pinterest for some inspiration and found a card, which was made for Halloween with a 3D pumpkin on it and that triggered an idea in my head, so thank youMarlene.
To start this canvas off I did a background wash using Gold and Bronze Luscious Powders mixed with water and whilst that was drying I used a brick die to cut out parts on a piece of Kraft card stock then used a couple of the images from the "Hocus Pocus" stamp set.
I added a layer of painted cardboard and Burlap.
The main image from the stamp set was stamped and coloured in with inks and paint.
I painted a white piece of card with Burning Bonfire English cottage paint and went over it with one of the New Stencils, "Damaged Dots" and Pheasant Bronze (Metallic). Dies were used to cut out five circles to make the 3D Pumpkin.
Green card was cut and curled to make the top part of the pumpkin.
Spiders from the stamp set were stamped onto acetate.
Embossing paste was mixed with some Gold Luscious and put through the Diamond and Laurel stencil layered over the Kraft card.
Embossing paste was used again, mixed with Hunter Green paint and used straight onto the canvas and also onto white card with the Laurel leaves stencil. Once the leaves on the card was dry I fussy cut them out and painted over the top of them with Gold Luscious powder mixed with water.
To finish off this piece I added a sentiment from the same stamp set, silver thread, wooden toppers, burlap flowers, die cut leaves from the remaining painted card and gems.
I would love to think this piece has given you some inspiration to create something for yourself for this months Blog Challenge.
On Friday Martin and I traveled up to London so that I could go to the Craft Show at Ally Pally as IndigoBlu had a stand there.
It was touch and go as to us going as I was so nervous about meeting Kay Halliwell-sutton and Jenny Marples for the first time but I am so glad I did go.
Both Jenny and Kay were so welcoming even though they were both rushed off their feet with Demo's, workshops and answering all sorts of questions and queries. Alfie H-S was doing a sterling job manning the till. Suffice to say I managed to buy a few extra bits that "I really needed"!
Kay and Jenny
Front of the IndigoBlu stand where Kay was demonstrating and I spied a few of my projects
Alfie and Kay H-S. Husband and Wife team. Such lovely friendly people
I have to say, not sure what I expected to see, but I wasn't expecting this. The building is very grand, quite a few steps leading up to the Palm Court entrance and the landscape around is lovely. The car park was hidden behind tree's so it really didn't feel that it was going to be that busy. (I have only ever been to the National Indoor Arena (NIA) in Birmingham for Craft Shows before so I suppose I was thinking on those lines about this show.) No comparison at all!
The day was a busy one and at times a bit hectic. (It doesn't show that here as I took the photo's when I left the building)!
As I didn't have a ticket I joined the queue to purchase one then was able to make my way into the hall. Now to find the IndigoBlu Stand! I decided to walk down the center and towards the Hochanda stand and soon found the IndigoBlu Stand. Everyone was so busy, I could see that Jenny's workshop was coming to an end so went over to see her first. I said 'Hello' and it was lovely that she recognized me. I then spoke brifly to Alfie and with hands trembling went and said hello to Kay. Why was I so worried. Both Jenny and Kay welcomed me and are really lovely ladies. As they were so busy I said I would pop back later to see them. I went off to see what else was at the show then messaged Jannet Blay whom I knew was there with her Mum and we arranged to meet up. It was lovely to meet someone else who shares the same love for the IndigoBlu products. Jannet is also a newbie, she is on the International team and creates the most wonderful pieces. Check out this project, very special.
So after looking around the show for several hours, buying a few pieces, checking out a few more stands, taking photos of some wonderful pieces I went back to the IndigoBlu stand and managed to have another quick chat with everyone and asked if I could take a few photos.
By 3pm I had arranged to meet Martin outside so I said my Goodbyes and went outside to start our journey back home.
As some of you know i'm on the Design Team for IndigoBlu and I have been having such fun with the New Stencils making up some samples for their latest show on Hochanda with Lovely Jenny Marples.
I posted a few photos on Facebook and have received a few messages asking what techniques I used. So here are photos of the samples and a quick description on how I made them. I have also included a video I filmed a little while ago called 'Painting with Embossing Powders'! Just so you know the stencils were sold in sets of three on Hochanda. Here are the names of the sets and what each stencil is called.
CITYLIFE
Family, Cityscape, Whimsical houses,
BELIEVE
Believe, Wild Butterflies & Faith
STEAMPUNK
Cogs and Gears, Damaged Dots & Damaged Damask
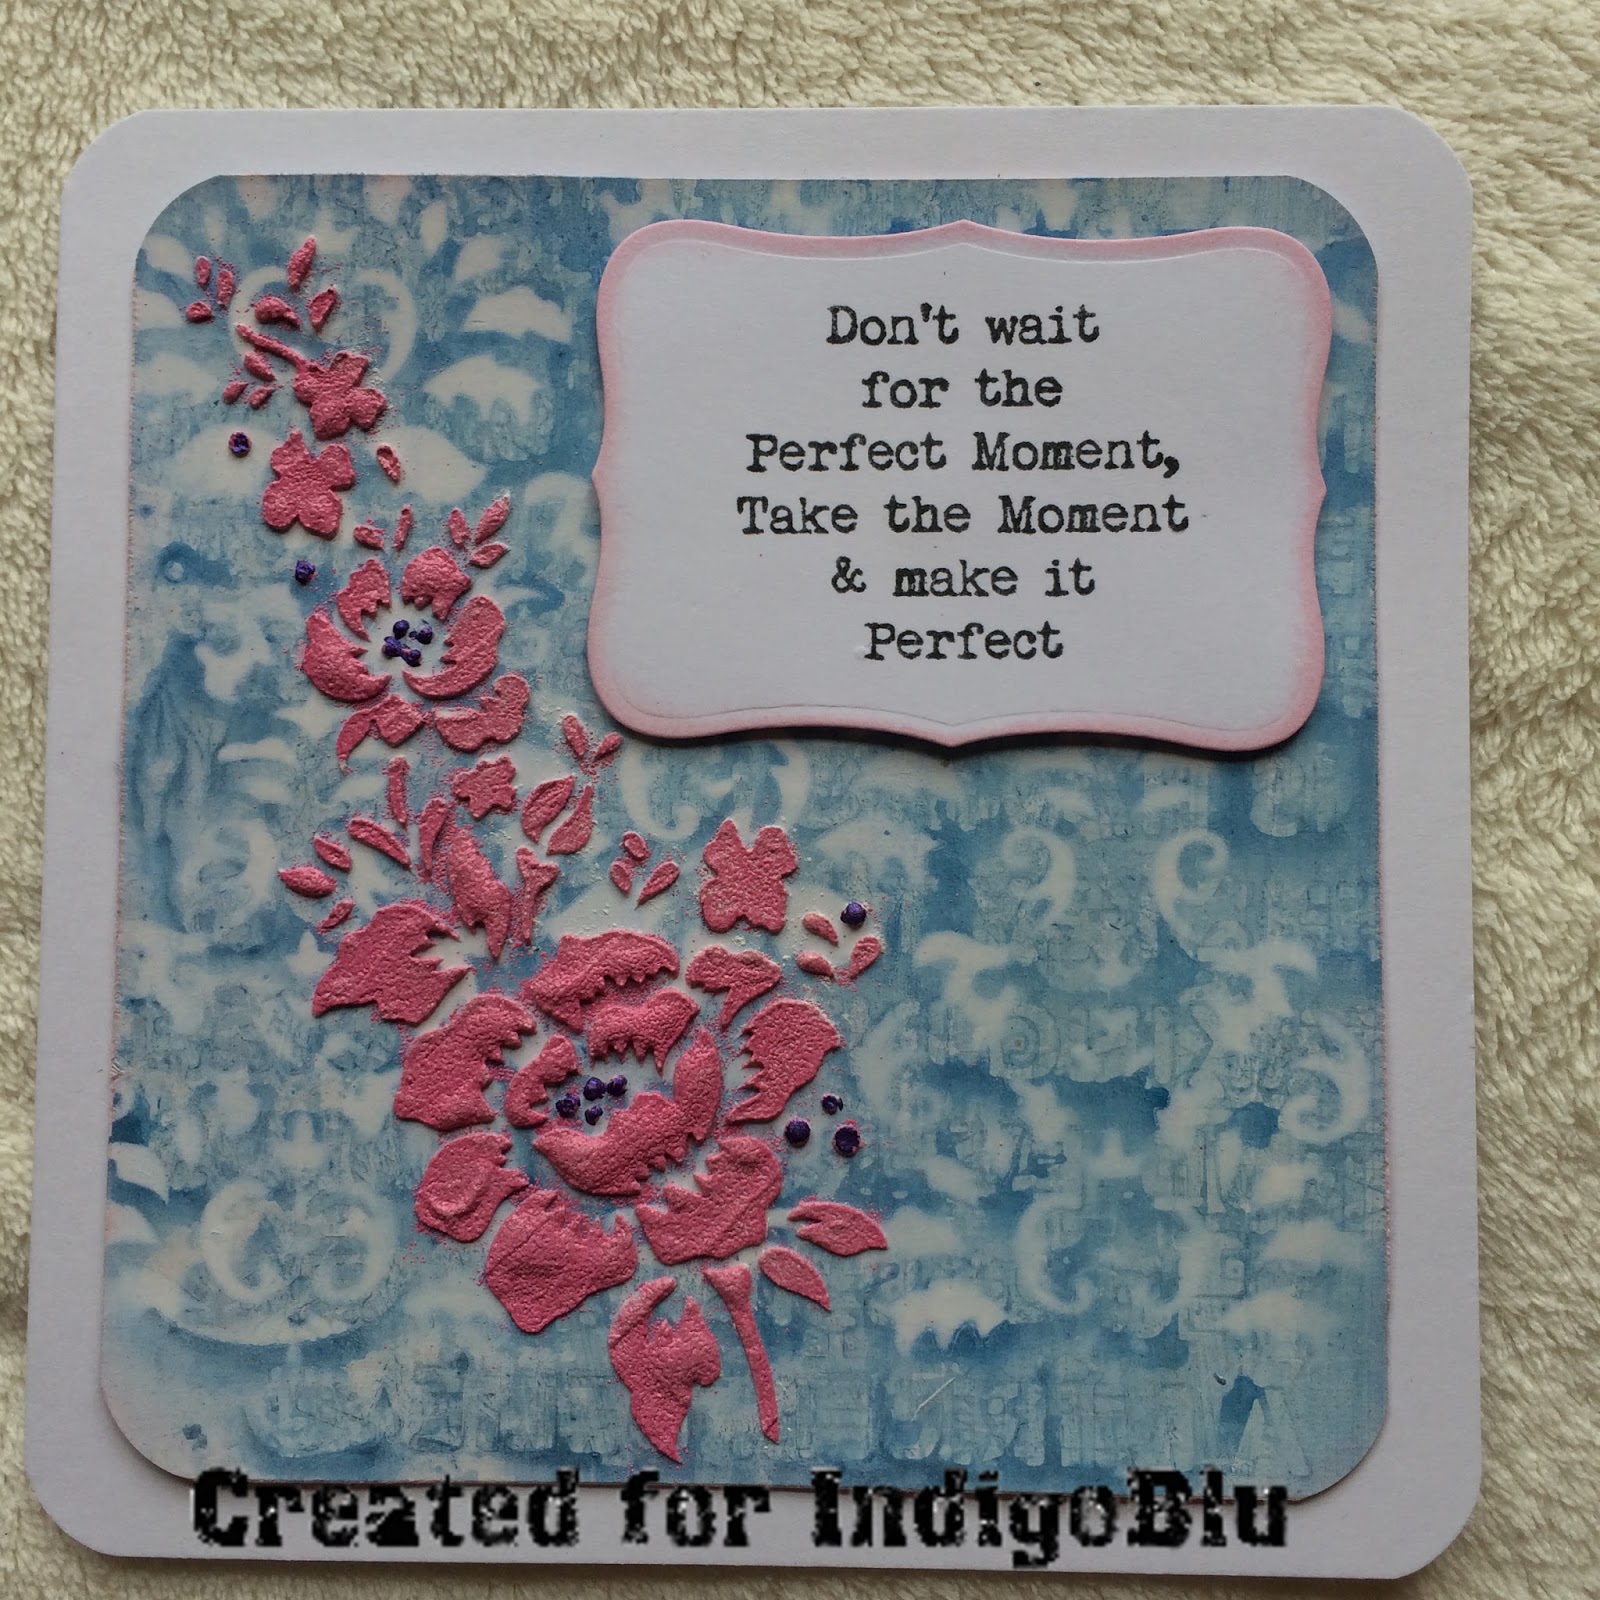
This card was created using the Wild Butterfly Stencil as the main Focus and the background was made using the paint I had used on two other stencils for different pieces. I just sprayed water on the stencils and put a piece of white card over the top and got a reverse image. The flower image was done with Matte Embossing paste then I sprinkled pink embossing powder over the wet image then gave it a blast with a heat gun. Just take care doing this as the embossing paste could bubble up and ruin your card!
For this card I used one of the papers from the New Range 'Steampunkesque' Mixed Media Paper Pad and placed the New 'Cogs & Gears' Stencil over the top of it and ran it through my Big Shot with a piece of foam over the top to get a better image from the stencil. I then sanded over the paper to bring up the embossed cogs. I then placed the New Stencil 'Damaged Dots' over the top and sponged through
For this card I ran the Cog & Gears through my Big Shot, same process as above but used silver foil backed with card. I then sponged over three colours of distress inks and once dry sprayed it with gold sparkle. The sentiment is a die cut attached to a strip of vellum.
For this card I used the old method of brass rubbing! Did you ever do this when at school on a trip to a Cathedral, Church etc?
I placed a thin piece of card over the Cityscape Stencil and rubbed over the top with Wax Crayons. (I found the chunky wax crayons better for this than the thin ones for this).This was backed onto a piece of black card to make it stand out more.
I had these little cotton bags in my stash and used the English Cottage Paints as they are great for stenciling onto material. I used two of the New Stencils, 'Wild Butterflies' and 'Faith'. (Before I started I placed a piece of cardboard inside the bag just to make sure the paints didn't bleed through). Apply the paints through the stencil using only a small amount of paint which you should work a little so you are applying almost next to nothing on your brush!
Once on layer was done and dry I then went over with the butterfly images. I mixed the paint with extra thick slap it on to give it a slight glossy finish. Once dry I added some beads to the butterflies bodies.
This was a simple card used from some leftover Extra Thick Slap-It-On mixed with paint that I had saved from a previous project. (Instead of just wiping it up and throwing it away I spread it onto a piece of card and left it to dry).
I stenciled on the Butterfly using ETSIO & Cinderella paint then once this was dry I went over it with the 'Damaged Dots' stencil and Snow White paint.
I had purchased a set of four coaster (£1) and gave them a make over.
Luscious powders were mixed with water in spray bottles I used these colours to make a background with a A4 sheet of thin card which was cut to size. I then stamped and painted flower images from IndigoBlu and used the Stencils 'Believe' & Family to stencil on various words in Black Gesso, then Raven Black Metallic Paint.
Now this card was done using the stencil 'Damaged Damask'. I used my Versamak pad, pressing it down over the stencil onto white card.I then sprinkled over the image with several different colours of embossing powders. (If you would like to see how I did this I will add a link to a video tutorial I made a while back). Once heat set the card was cut into two panels to make this card. The inside of the card has a sentiment and part of the stencil design which I did using inks.
This card seemed to be a favorite! I first of all used the whole of the 'Whimsical Houses' Stencil as a background with Goldfinger paint. I then used the metal from a drinks can (Which I ran through my bigshot a few times to try and flatten it a bit)! and using the stencil and a embossing tool marked out three of the houses. I painted over the metal houses first in black gesso then Pheasant Bronze metallic paint. Once dry I sanded over the houses to bring back the lines and numbers.
This box was decorated with the 'Cityscape' stencil using embossing paste just through the dots. Once this was all dry I used distress inks to colour the box then went back in using the stencil to line the dots up once again and coloured them in with a contrasting colour ink.
The inside panels had words embossed on them using the stencils 'Believe and Family' Once the words were dry the panels were coloured in with distress inks and images were stamped on.
I hope you can see from all the above samples I have created that stencils can be used in so many different ways, I have only just scratched the surface. More ideas to come. Happy Crafting xx
For this reminder I have gone under the sea where there is a whole new world of colour and beauty.
To start off, I used a Tim Holtz Tag Die to cut out the tag then stamped out several fish from the stamp set 'Under the Sea', reverse stamping one of the fish images. I then went over the tag with a couple of shades of Distress inks.
The Sea Horses and the Sea Grasses were stamped using using a few different shades of Stazon inks
Three different colours of Seam Binding Ribbons were added to a small Bull Clip. To get the scrunched look to the ribbons I separated the fibers at the ends of the ribbon and pulled a couple of strands and pushed the ribbon up.
A sentiment from the stamp set was inked up in Black Stazon onto a piece of Acetate and placed onto the tag. Glitter glue was then added around the edge of the tag to finish it off.
And here is the finished tag
I hope this has inspired you to get your IndigoBlu stamps out and have a go yourself.
Talking about "Inspiring", please check out the IndigoBlu Blog and Facebook page for so many other projects.


